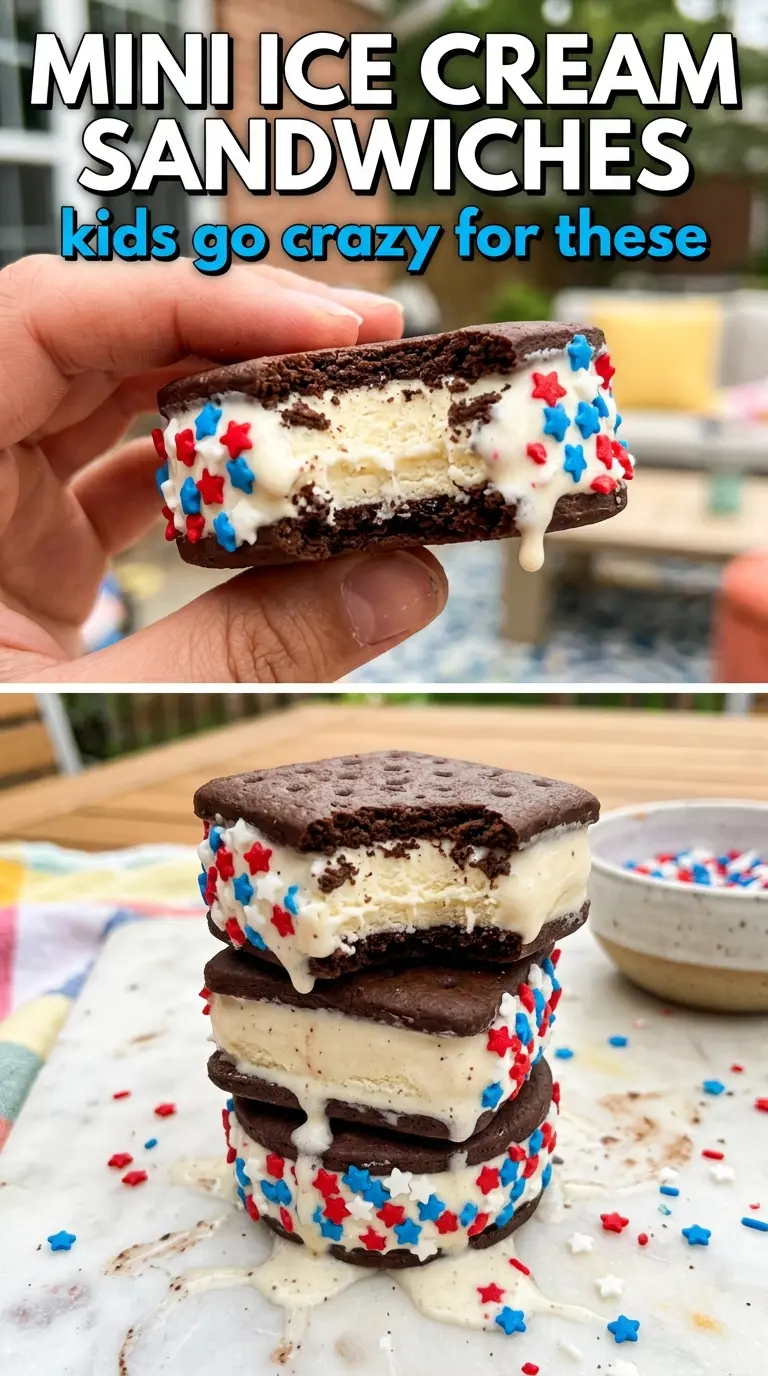
These patriotic mini ice cream sandwiches hit that sweet spot between nostalgic and party-ready: soft red velvet cookies, cold vanilla ice cream, and a border of red and blue sprinkles that makes every bite feel festive before you even take a taste. The cookies stay tender enough to bite cleanly once frozen, but they’re sturdy enough to hold the filling without crumbling all over your hands.
The trick is baking the cookies just until set, then cooling and freezing them before assembly. That keeps the ice cream from melting too fast and helps the sandwiches firm up into neat little stacks instead of squishy messes. Slightly softened ice cream spreads more evenly, and wrapping each sandwich individually gives you that bakery-case look when it’s time to serve.
Below, you’ll find the one timing detail that keeps these easy to assemble, plus a few smart swaps if you want to use chocolate cake mix or change up the sprinkle colors.
The cookies baked up soft but not cakey, and after freezing the sandwiches for a couple hours they sliced cleanly with no ice cream squeezing out the sides. My kids loved the sprinkle edges.
Like these red, white, and blue mini ice cream sandwiches? Save them to Pinterest for your next July 4th dessert table.
The Freeze Time That Keeps the Cookies Soft, Not Soggy
Most ice cream sandwiches fail because the cookies are either too delicate or too warm when they meet the ice cream. These need a brief freeze after baking so the cookies firm up enough to handle, but they should still stay soft at the center once frozen. That balance keeps the finished sandwiches easy to bite without turning the cookies into hard little discs.
The other mistake is rushing the assembly. If the ice cream is melted too far, it smears past the cookie edge and the sprinkles fall off before they have a chance to stick. Slightly softened means scoopable, not soupy. You want it to mound, then press into place with just enough give to seal the edges.
- Red velvet cake mix — This gives the cookies their color and a soft, chewy texture with almost no effort. Chocolate cake mix works the same way if you want a deeper cocoa flavor and don’t need the red color.
- Eggs and oil — These are what turn the dry mix into a cookie dough instead of cake batter. Don’t cut either one back, or the cookies will bake up dry and crack when you sandwich them.
- Vanilla ice cream — Use a brand you like eating plain because it’s the main filling here. Slightly softened ice cream is easier to portion and press, but it should still be cold enough to hold its shape.
- Red and blue sprinkles — Jimmies or small rod sprinkles cling best to the ice cream edge. Nonpareils tend to roll off and make a mess.
What Each Ingredient Is Actually Doing in This Ice Cream
- Base ingredient (cream, milk, or custard) — This provides the foundation and richness. Quality matters.
- Sweetener (sugar, honey, or condensed milk) — This sweetens and prevents ice crystals. The ratio is critical.
- Flavor element (vanilla, fruit, chocolate, or other) — This defines the ice cream personality. Use quality ingredients.
- Egg yolks (if making custard base) — These create richness and silky texture. Optional but elevates ice cream.
- Churning (if using ice cream maker) — This incorporates air and prevents ice crystals. Critical for smooth texture.
- Freezing temperature and time — Proper freezing prevents rock-hard texture. Store at 0°F or below.
- Mix-ins (chocolate, cookies, fruit, or swirls) — These add texture and prevent one-dimensional flavor. Add near end of churning.
- Serving temperature (slightly soft, not rock hard) — This provides creamy mouthfeel. Remove from freezer 5 minutes before serving.
Assembling Them Before the Ice Cream Gets Away From You
Baking the Cookie Rounds
Stir the cake mix, eggs, and oil until a thick dough comes together and no dry patches remain. Scoop tablespoon-sized portions and flatten them into thin circles so they bake into sandwich-friendly cookies instead of puffy domes. Pull them when the tops look set and the edges are just beginning to firm up; if they go much past that, they’ll get dry and crack when frozen.
Cooling and Chilling the Cookies
Let the cookies cool all the way on a wire rack before you even think about the ice cream. Warm cookies melt the filling on contact, and then the whole sandwich slides around while you try to coat the edges. A 30-minute freeze on the cooled cookies gives them enough structure to handle cleanly.
Filling, Rolling, and Wrapping
Work with a few cookies at a time and keep the rest in the freezer so they stay cold. Place the ice cream on the flat side of one cookie, top with another, then press just until the filling reaches the edge. Roll that exposed ice cream edge in sprinkles right away, wrap the sandwich snugly in plastic wrap, and freeze until fully solid; if you skip the wrap, the ice cream picks up freezer smell fast and the cookies dry out.
Small Swaps That Still Keep the Red, White, and Blue Spirit
Chocolate Cake Mix Version
Swap in chocolate cake mix for a richer cookie that tastes more like a classic ice cream truck sandwich. The cookies will be a little darker and less festive on their own, so the sprinkles matter even more for the patriotic look.
Gluten-Free Version
Use a gluten-free red velvet or chocolate cake mix and follow the same method. The dough may be a touch softer, so chill the scooped cookies for 10 minutes before baking if they spread too much.
Different Sprinkle Colors
You can change the sprinkle colors for any holiday without changing the method at all. Use the same red and blue mix for July 4th, go with red and green for Christmas, or stick to one color family if that’s what’s in the pantry.
Storage and Reheating
- Refrigerator: These don’t hold well in the fridge; the cookies soften too much and the ice cream starts to melt. Keep them frozen instead.
- Freezer: Freeze individually wrapped sandwiches for up to 2 weeks for the best texture. After that, they’re still safe, but the cookies start to pick up freezer flavor.
- Reheating: No reheating needed. Let them sit at room temperature for 2 to 3 minutes before serving so the cookie layer gives a little when you bite in.
Questions I Get Asked About This Recipe

Patriotic Mini Ice Cream Sandwiches
Ingredients
Equipment
Method
- Preheat oven to 350°F and line baking sheets with parchment paper, leaving a clean, nonstick surface for the cookies.
- Mix cake mix, eggs, and vegetable oil together until a thick dough forms.
- Scoop tablespoon-sized balls onto prepared baking sheets, flatten to about 1/4-inch thick circles, and keep spacing so they bake evenly.
- Bake for 8–10 minutes at 350°F until set—do not overbake, so the cookies stay tender enough to sandwich.
- Let cookies cool completely on a wire rack until no longer warm to the touch.
- Freeze cookies for 30 minutes to firm them up before assembling.
- Working quickly, place a scoop of slightly softened vanilla ice cream on the flat side of one cookie and press another cookie on top to form each sandwich.
- Roll the exposed ice cream edge in red and blue sprinkles to create a festive colorful border.
- Wrap each sandwich in plastic wrap to protect the ice cream from drying out.
- Freeze for at least 2 hours until solid, with the ice cream firm and the sprinkle edges set before serving.