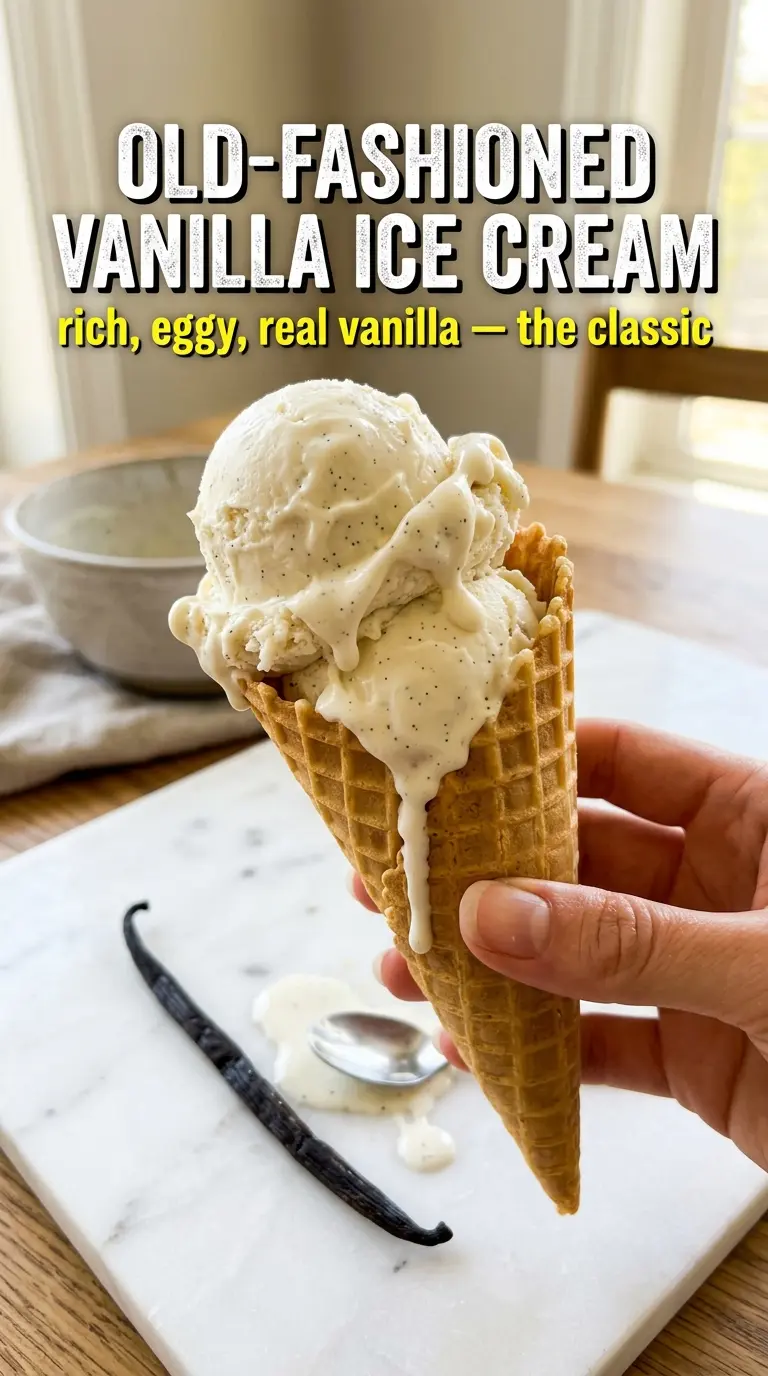
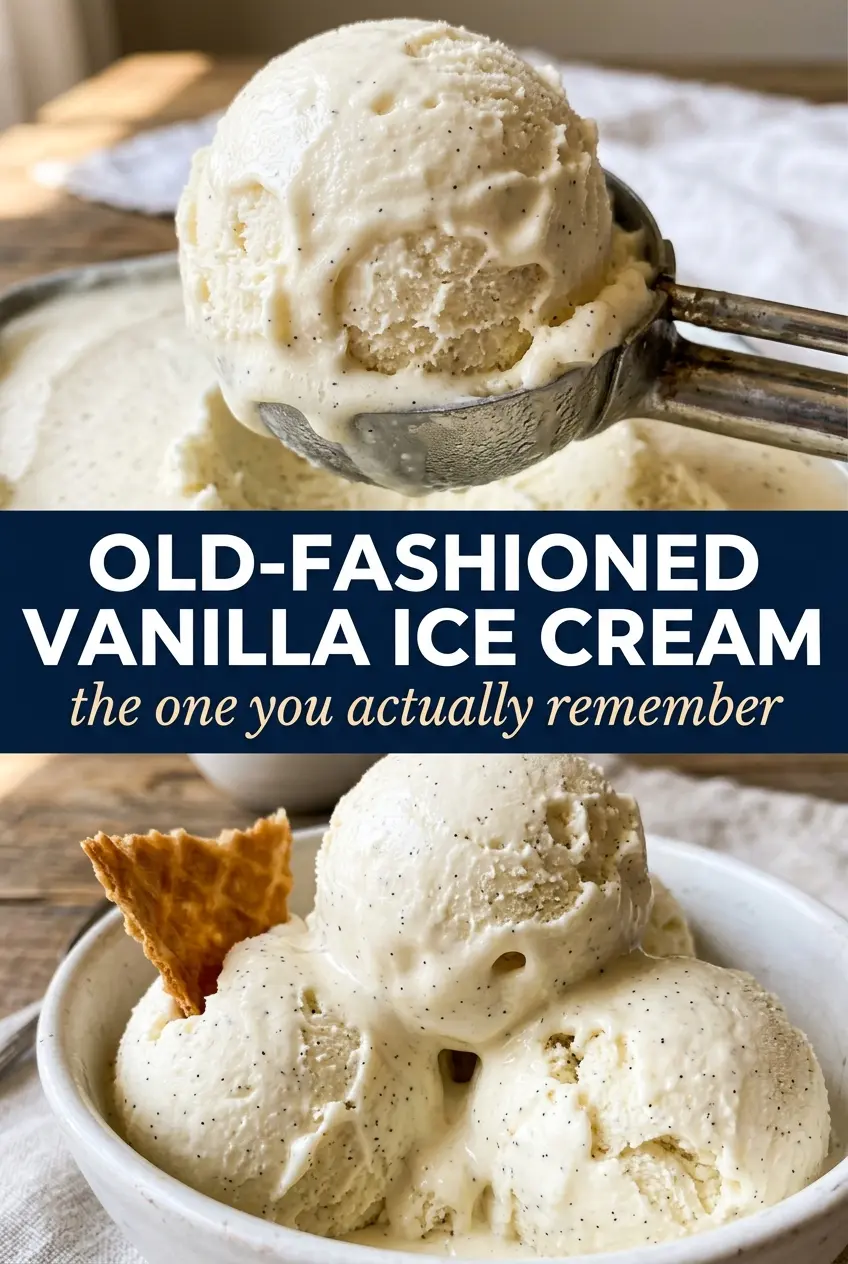
Pale golden vanilla ice cream with that deep custard richness is one of those desserts that disappears faster than you expect. The texture is dense and creamy instead of airy, and the flavor lands with a clean vanilla finish that feels old-school in the best way. This version earns its keep because it tastes like actual custard, not just sweet cream frozen in a machine.
The difference comes from the yolks and the slow cooking. Egg yolks give the base body, while a gentle cook to 175°F keeps the custard smooth instead of turning it grainy. Steeping the vanilla bean in the warm dairy pulls out more flavor than extract alone, and a long chill gives the mixture time to fully relax before churning.
Below, I’ve included the little details that matter most: how to keep the custard from scrambling, when to use a bean versus extract, and what to do if you want the cleanest possible scoop after freezing.
The custard thickened exactly when you said it would, and the vanilla bean specks made it taste like a real ice cream shop pint. It froze up smooth, not icy, and I didn’t have any trouble scooping it after an hour on the counter.
Save this old-fashioned vanilla ice cream for the days when you want a dense, custard-style scoop with real vanilla bean flavor.
The Part Where Most Ice Cream Bases Go Thin
The mistake most people make is pushing the custard too fast once the eggs go in. High heat tightens the yolks before the dairy has time to emulsify, and that’s when you end up with a thin base that turns icy after churning. Keep the heat at medium-low and stir with a spatula or wooden spoon, scraping the bottom and corners so nothing sits and overcooks.
Another thing worth knowing: the custard should coat the back of a spoon and leave a clean line when you run a finger through it. If it’s bubbling like soup, it’s already too hot. If you catch it at the right point, the finished ice cream churns to a smoother, richer texture and freezes with a softer scoop.
What Each Ingredient Is Really Doing in the Custard
- Heavy cream — This brings the fat that makes the ice cream taste plush and scoop cleanly. Lower-fat dairy won’t give you the same body or that classic custard finish.
- Whole milk — It balances the richness so the base doesn’t become greasy. I wouldn’t swap in skim milk here; the texture gets flatter and more icy.
- Egg yolks — These thicken the custard and keep the finished ice cream dense instead of fluffy. Whole eggs will work in a pinch, but the flavor and texture won’t be as rich.
- Vanilla bean — The bean is what gives you those visible specks and a deeper, rounder vanilla flavor. If you only have extract, stir it in after cooking so the flavor doesn’t cook off.
- Sugar — Beyond sweetness, sugar helps keep the ice cream softer straight from the freezer. Reducing it too much makes the final texture harder and less scoopable.
- Salt — A small amount sharpens the vanilla and keeps the custard from tasting flat. Don’t skip it.
From Steeped Dairy to Churned Ice Cream
Infusing the Vanilla
Split the vanilla bean, scrape out the seeds, and add both the seeds and pod to the cream and milk before heating. Warm the dairy until it’s steaming and just barely starting to simmer, then take it off the heat and let it steep for 15 minutes. That pause matters because it pulls more flavor from the bean without forcing the dairy into a boil, which can mute the vanilla and make the base taste cooked.
Tempering the Yolks
Whisk the yolks and sugar until the mixture turns paler and thicker, then pour in the warm dairy slowly while whisking constantly. That slow stream is what keeps the eggs from scrambling. If you dump the hot liquid in all at once, the yolks set in little bits before they can blend back into the custard.
Cooking to the Right Thickness
Pour everything back into the saucepan and cook over medium-low heat, stirring all the time, until the custard thickens enough to coat the back of a spoon and reaches 175°F. Pull it off the heat the second it gets there; if you keep going, the eggs tighten and the texture turns grainy. Strain the custard through a fine-mesh sieve, then stir in the salt so you catch any cooked bits before they end up in the freezer.
Chilling, Churning, and Freezing
Cool the custard over an ice bath first, then refrigerate it for at least 4 hours or overnight. Cold base churns faster and traps air more evenly, which gives you a smoother finish. Churn until it looks like soft-serve, then freeze it until firm; if you want clean scoops, let the container sit out for 5 to 10 minutes before serving instead of forcing the spoon through hard-packed ice cream.
Ways to Adjust the Batch Without Losing the Creamy Texture
Vanilla Bean or Vanilla Extract
A bean gives you the flecks and the deepest flavor, but 2 teaspoons of pure vanilla extract works when that’s what you have. Stir the extract in after the custard has cooled so the flavor stays bright instead of cooking off on the stove.
Dairy-Free Version
For a dairy-free batch, use full-fat canned coconut milk in place of the cream and milk, but expect a faint coconut note and a slightly softer freeze. The custard still needs the yolks for body, so this isn’t a good recipe to make egg-free.
No-Churn Shortcut
You can’t copy the texture exactly without churning, but you can freeze the cooled custard in a shallow pan and stir it every 30 to 45 minutes until set. The result is denser and a little icier, but it still tastes like real vanilla ice cream instead of a frozen cream dessert.
Storage and Reheating
- Refrigerator: Store the custard base up to 2 days before churning, tightly covered, if you want to make it ahead.
- Freezer: Finished ice cream keeps well for about 2 weeks before the texture starts to get a little harder and icier around the edges.
- Reheating: Ice cream doesn’t need reheating, but it does need a brief thaw. Let it sit at room temperature for 5 to 10 minutes before scooping; microwaving melts the outside before the center softens.
Answers to the Questions Worth Asking
Old-Fashioned Homemade Vanilla Ice Cream
Ingredients
Equipment
Method
- Split the vanilla bean and scrape the seeds; add the pod and seeds to the heavy cream and whole milk in a saucepan, then heat over medium heat until steaming and just beginning to simmer.
- Remove from the heat and let the mixture steep for 15 minutes, then remove the vanilla pod.
- Whisk the egg yolks and granulated sugar together until pale and thick.
- Slowly pour the warm cream into the yolks while whisking constantly.
- Return the custard to the saucepan and cook over medium-low heat, stirring constantly, until thickened to coat the back of a spoon at 175°F.
- Strain the custard through a fine mesh sieve, stir in the salt, and cool over an ice bath.
- Refrigerate at least 4 hours or overnight, then churn in an ice cream maker.
- Freeze until firm for scoopable texture.