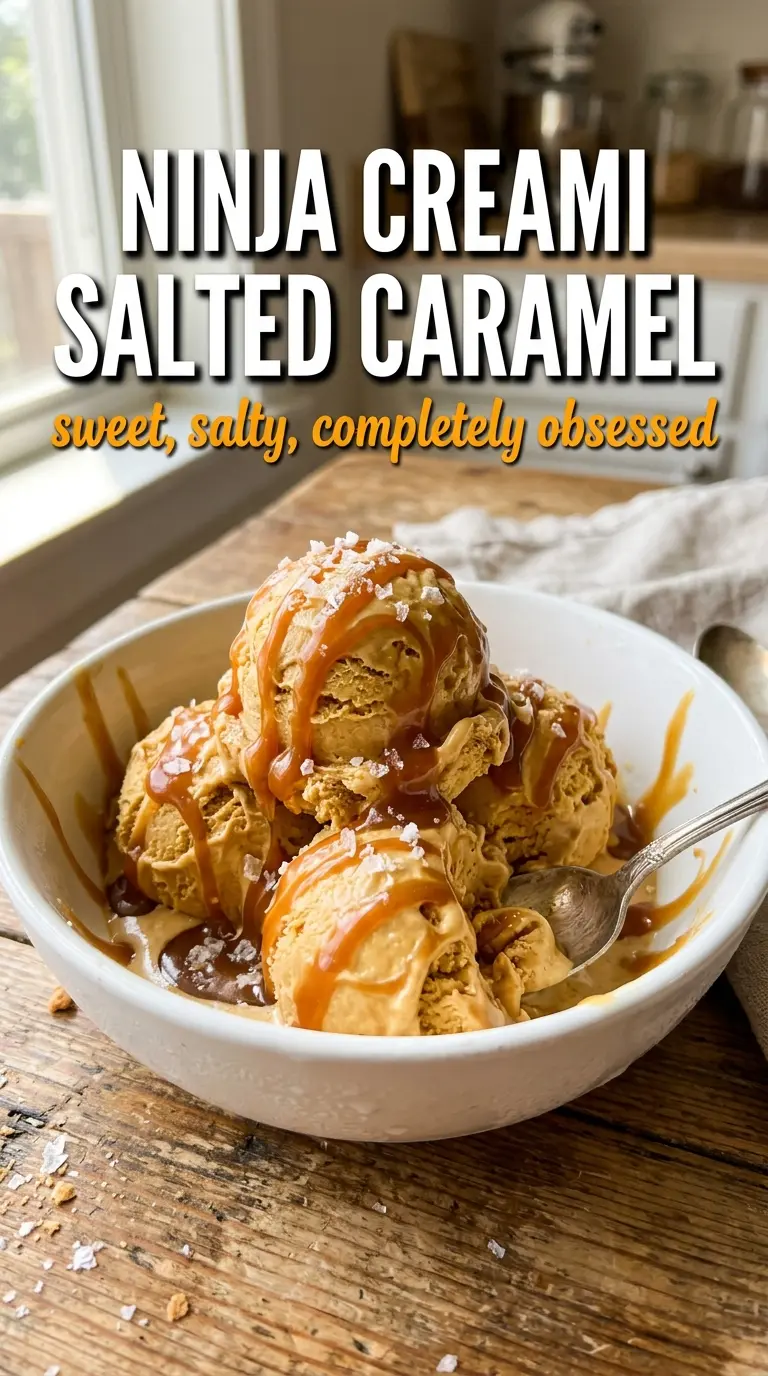
Rich caramel ice cream made in the Ninja Creami lands with a texture that feels straight out of a scoop shop: dense, smooth, and just soft enough to melt on the tongue. The caramel brings that deep amber flavor, while the sea salt keeps it from drifting into candy-sweet territory. The result is a pint that tastes layered and finished, not flat.
The trick here is building enough body before freezing so the Creami can spin it into something creamy instead of icy. Whole milk and heavy cream give the base the right fat balance, and a spoonful of cream cheese adds a little insurance against a chalky texture. The caramel sauce does more than flavor the base; it also helps the mixture stay scoopable after freezing.
Below, I’m walking through the part that matters most: how to blend the base completely smooth, what to look for after the first spin, and how to fix it if the pint comes out too firm. I’ve also included a few smart swaps and storage notes so you can make this pint work with what you already have.
The caramel flavor came through beautifully and the texture was spot on after one re-spin. I added a tiny splash of milk, and it turned out creamy instead of icy with that perfect salty finish.
Like this salted caramel pint? Save it to Pinterest for the nights when you want a deeply caramelized Ninja Creami dessert with a salty-sweet finish.
The Trick to Keeping This Creami Pint Smooth Instead of Icy
The biggest risk with homemade ice cream in the Ninja Creami is a base that freezes hard and turns crumbly after spinning. That usually happens when the mix is too lean or not fully blended before it goes into the pint. This version avoids that by leaning on both cream and a small amount of cream cheese, which gives the base enough fat and structure to shave down into something silky.
Caramel sauce can also work against you if it’s too thick or clumpy. Stirring it with the milk, cream, and sugar until the mixture is completely smooth matters more than people think. If you can still see little streaks of cream cheese or caramel, those spots can freeze into uneven bits that won’t fully disappear in the spin.
- Whole milk — This keeps the base from getting heavy or overly rich. Skim milk won’t give the same soft texture, and the pint can come out more icy.
- Heavy cream — This is what gives the ice cream body and that dense, scoopable texture after spinning. Half-and-half can work in a pinch, but the result will be lighter and a little less plush.
- Caramel sauce — Use a sauce that’s smooth and pourable, not a stiff candy-like caramel. Store-bought is fine here as long as it tastes good on its own.
- Cream cheese — Just a tablespoon helps emulsify the base and keeps the final texture smoother. Let it soften first so it blends in without little lumps.
- Sea salt — This is the part that makes the caramel taste deeper instead of just sweeter. Fine sea salt dissolves cleanly; flaky salt is better saved for the top.
What Each Ingredient Is Actually Doing in This Ice Cream
- Base ingredient (cream, milk, or custard) — This provides the foundation and richness. Quality matters.
- Sweetener (sugar, honey, or condensed milk) — This sweetens and prevents ice crystals. The ratio is critical.
- Flavor element (vanilla, fruit, chocolate, or other) — This defines the ice cream personality. Use quality ingredients.
- Egg yolks (if making custard base) — These create richness and silky texture. Optional but elevates ice cream.
- Churning (if using ice cream maker) — This incorporates air and prevents ice crystals. Critical for smooth texture.
- Freezing temperature and time — Proper freezing prevents rock-hard texture. Store at 0°F or below.
- Mix-ins (chocolate, cookies, fruit, or swirls) — These add texture and prevent one-dimensional flavor. Add near end of churning.
- Serving temperature (slightly soft, not rock hard) — This provides creamy mouthfeel. Remove from freezer 5 minutes before serving.
Freezing the Base So the First Spin Works
Blending Until the Base Is Fully Emulsified
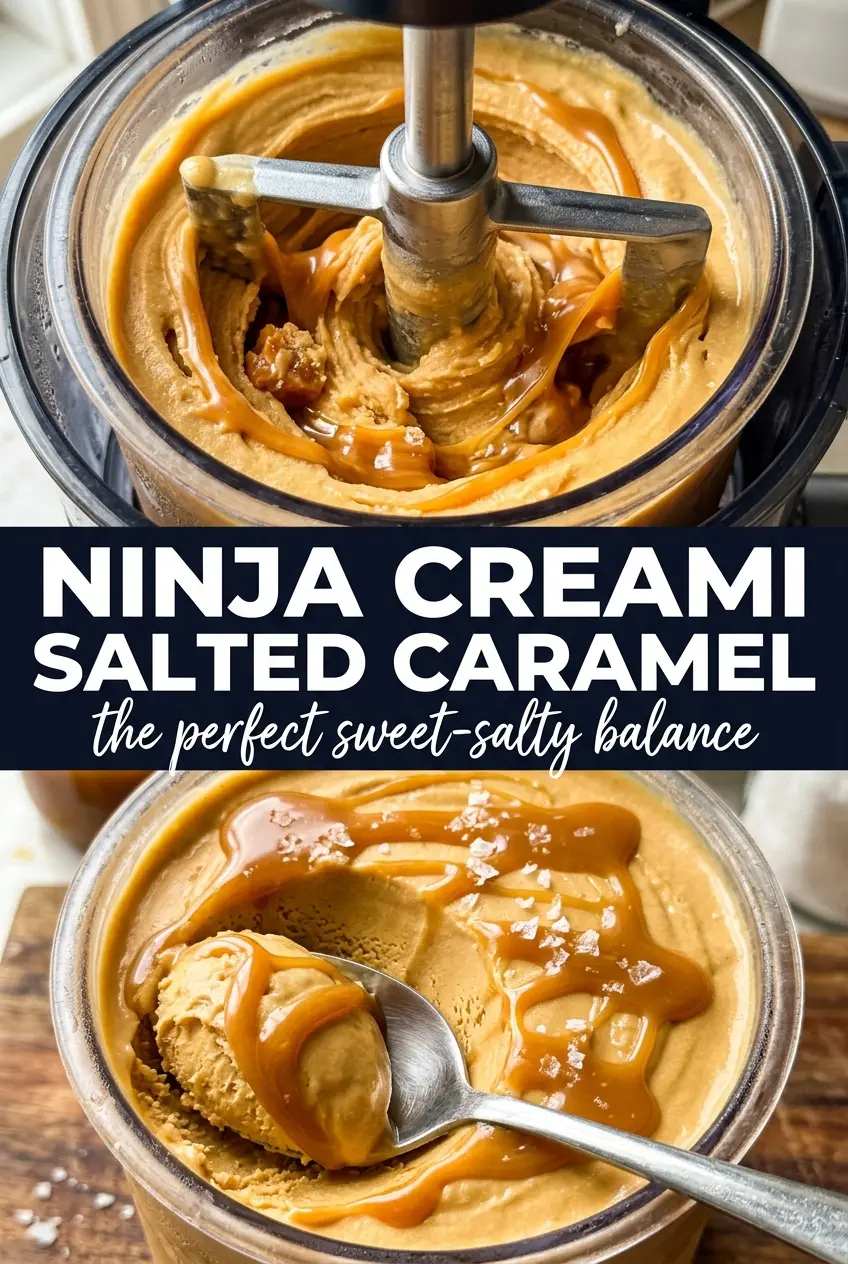
Blend the milk, cream, caramel sauce, brown sugar, cream cheese, vanilla, and sea salt until the mixture looks completely uniform and a little glossy. The cream cheese has to disappear here, or you’ll end up with tiny dense flecks after freezing. If you’re using a blender, scrape the sides once and blend again; if you rush this part, the final texture will show it.
Filling the Pint the Right Way
Pour the mixture into the Ninja Creami pint and stop about 1 inch below the top. That headspace matters because the base expands a little as it freezes and then needs room for the blade to work. If you overfill it, the texture at the top can get uneven and the machine may struggle on the first spin.
Spinning, Then Deciding Whether It Needs Milk
Freeze the pint for a full 24 hours until solid all the way through. Run the Ice Cream setting first and look at the center before you touch anything else. If it comes out powdery or crumbly, add just a splash of milk and re-spin; too much milk turns it loose and soft instead of creamy.
Dairy-Free Version
Use full-fat coconut milk in place of the whole milk and cream, and swap in a dairy-free caramel sauce. The texture will be a little less rich and more coconut-forward, but it still spins into a creamy pint if the base is blended smooth and frozen solid.
Extra-Salty Caramel Finish
Keep the base as written, then finish each serving with flaky salt and an extra drizzle of caramel sauce. That adds contrast without making the whole pint taste salty, and it gives you that sticky-sweet topping layer people expect from salted caramel.
Lower-Sugar Version
Cut the brown sugar back to 1 tablespoon and use a caramel sauce that isn’t overly sweet. The pint will taste a little less round and candy-like, but the salt and vanilla will stand out more clearly.
Storage and Re-Spinning
- Refrigerator: Don’t store the finished ice cream in the fridge; it melts into a loose custard-style base and loses the Creami texture.
- Freezer: The frozen base keeps well for up to 2 weeks in the pint, tightly covered. After that, ice crystals start to creep in and the texture gets drier.
- Reheating: Let the pint sit at room temperature for 5 to 10 minutes before re-spinning if it comes out extremely firm. That short rest softens the edges just enough for the blade to shave it cleanly instead of turning it chalky.
Questions I Get Asked About This Recipe
Ninja Creami Salted Caramel Ice Cream
Ingredients
Equipment
Method
- Blend whole milk, heavy cream, caramel sauce, brown sugar, cream cheese, vanilla extract, and sea salt until completely smooth and no cream cheese lumps remain. Scrape down the sides as needed to keep the mixture uniform.
- Pour the mixture into the Ninja Creami pint container, leaving 1 inch of headspace. Freeze for 24 hours until solid.
- Process on the Ice Cream setting. If the texture is too firm, re-spin with a splash of milk.
- Drizzle extra caramel sauce and flaky sea salt on top before serving to finish with a salted-sweet bite.