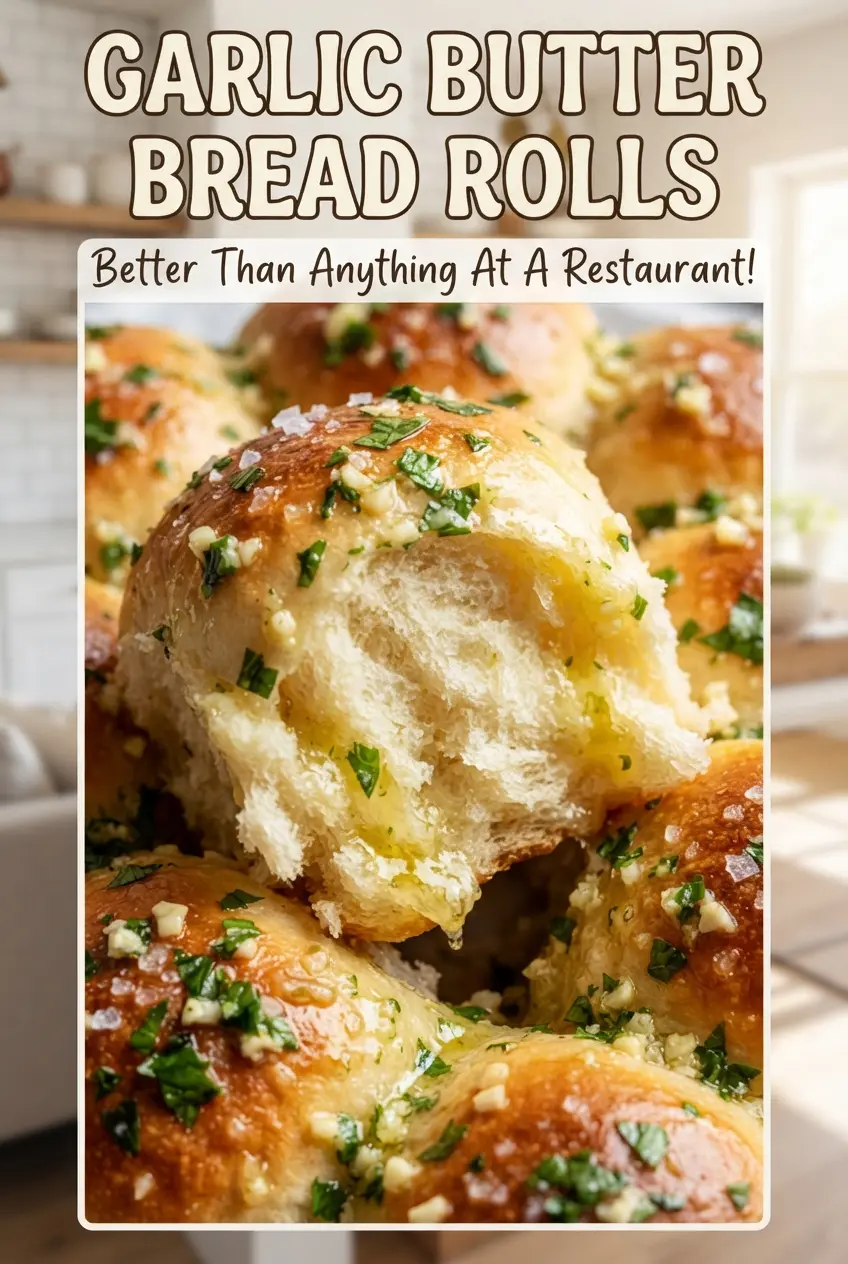
Golden garlic butter bread rolls earn their place on the table fast: soft enough to pull apart in one warm, steamy piece, but sturdy enough to soak up whatever lands on the plate beside them. The tops bake into a light, glossy crust, then the garlic butter sinks in and turns every torn edge fragrant and rich. They disappear quickly because they’re the kind of roll people tear into before the rest of dinner is even served.
The dough here stays simple on purpose. Warm milk gives the rolls a softer crumb than water ever will, while the egg and butter add enough richness to keep them tender after baking. The first rise builds flavor, but the second rise is what gives you that puffy pull-apart texture in the pan. If you rush that part, the rolls bake up denser and less even, so it’s worth waiting until they look visibly fuller before they go into the oven.
Below, I’ll walk through the part that matters most: getting the dough smooth without over-flouring it, and brushing the garlic butter on while the rolls are still hot so it soaks into every crack instead of sliding off the top.
The rolls baked up soft and fluffy, and the garlic butter soaked right into the tops instead of just sitting there. I tore one open straight from the pan and the center was light and stretchy, not doughy at all.
Save these garlic butter bread rolls for the next dinner that needs warm, fluffy pull-apart bread with a glossy garlic finish.
The Reason These Rolls Stay Soft Instead of Going Dry
Dry rolls usually come from one of two places: too much flour or underproofing. This dough should feel soft and a little tacky before the first rise, not stiff and tidy in your hands. If you keep adding flour until it feels like bread dough from a factory line, the rolls will bake up heavier and the centers won’t tear apart with that nice, feathery pull.
The other thing that matters is the second rise in the pan. Those 30 minutes are what give the rolls their height and the way they bake into each other just enough to stay tender around the edges. If the dough hasn’t visibly puffed, the rolls will still taste fine, but they won’t have the same cloud-like texture when they come out of the oven.
- Instant yeast — It goes straight into the milk mixture without blooming separately, which keeps the process quick. If you only have active dry yeast, dissolve it in the warm milk and give it a few extra minutes to wake up before moving on.
- Warm milk — Milk at about 110°F gives the yeast a friendly start and makes the crumb softer than water does. If it’s too hot, it can slow or kill the yeast; if it’s too cool, the dough just takes longer to rise.
- Butter in the dough — This is what keeps the rolls rich and tender. Melted butter works fine here because the dough isn’t being laminated or shaped into something delicate.
- Flaky sea salt on top — The rolls need that final hit of salt after the garlic butter goes on. Table salt in the topping will taste harsher and disappear faster against the warm bread.
Building the Dough, Pan, and Garlic Butter Finish

- Egg — The egg adds structure and a little extra richness, which helps the rolls bake up soft but not fragile. Use a large egg and bring it close to room temperature if you can, because cold egg can make the dough feel claggy for the first minute of mixing.
- All-purpose flour — This is the right flour for a tender side roll. Bread flour will make them chewier and a little less pillowy, which isn’t the goal here.
- Garlic — Fresh minced garlic gives the butter its bite. Garlic powder won’t give the same aroma or little flecks on top, and jarred garlic can taste flat after baking.
- Parsley — Fresh parsley brightens the butter and keeps the finish from tasting heavy. Dried parsley works in a pinch, but it won’t look or taste nearly as fresh.
Kneading, Proofing, and Brushing at the Right Moment
Mixing Until the Dough Turns Smooth
Once the flour goes in, knead until the dough turns elastic and starts to pull away from the bowl, usually 6 to 8 minutes by hand or with a dough hook. The dough should be soft and springy, not dry enough to resist every fold. If it still smears badly on the counter, keep kneading a little longer before adding more flour; most doughs need more time, not more dusting.
Letting the First Rise Do Its Job
Cover the bowl and let the dough rise until doubled, which usually takes about an hour. You’re looking for a fuller, lighter mass with a slightly domed top and a faint yeasty smell. If your kitchen is cool, the clock matters less than the size; wait for the dough to actually swell, because under-risen dough bakes up tight and uneven.
Shaping for the Pull-Apart Pan
Divide the dough into 12 even pieces and roll each one into a smooth ball before placing them in a greased 9×13-inch pan. The smoother the balls, the more evenly they’ll rise and bake, and the pan keeps them close enough to turn into soft-sided rolls. If the dough resists shaping, let it rest for a few minutes; that short pause relaxes the gluten and makes the balls easier to round.
Finishing While the Rolls Are Hot
Bake until the tops are deeply golden, then brush the garlic butter over the rolls right away. Hot bread drinks up the butter instead of repelling it, which is what gives these rolls that glossy, fragrant top. Sprinkle the flaky salt on immediately while the butter is still wet so it sticks instead of sliding off.
How to Adapt These Rolls for Different Tables and Different Weeks
Dairy-Free Version That Still Tastes Rich
Swap the milk for an unsweetened plain non-dairy milk and use a good dairy-free butter for both the dough and topping. The rolls will still be soft, but they’ll lose a little of the round dairy sweetness that makes the original taste extra plush.
Garlic Herb Rolls Without the Strong Garlic Bite
Cut the garlic in half and add a little extra parsley if you want a milder finish. This works well for kids or for serving beside a strongly seasoned main dish, and the rolls still keep that buttery aroma without overpowering the rest of the meal.
Make-Ahead Rolls for a Busy Day
Shape the rolls, place them in the pan, and refrigerate them covered after the first rise. The next day, let them come back toward room temperature and puff up before baking. That slow chill can deepen the flavor, but don’t bake them straight from the fridge or the centers will lag behind the tops.
Storage and Reheating
- Refrigerator: Store in an airtight container for 3 days. The rolls will firm up a little in the fridge, but they’ll soften again with gentle reheating.
- Freezer: Freeze the baked rolls tightly wrapped for up to 2 months. Thaw at room temperature before reheating so the centers don’t stay icy.
- Reheating: Warm in a 300°F oven, covered loosely with foil, for 8 to 10 minutes. The foil keeps the tops from drying out, which is the mistake that turns good rolls chewy and dull.
Answers to the Questions Worth Asking
Garlic Butter Bread Rolls
Ingredients
Equipment
Method
- Whisk warm milk, instant yeast, and sugar together, then let the mixture sit 5 minutes until foamy. Look for bubbles on the surface before moving on.
- Add the egg, melted butter, salt, and all-purpose flour, then knead 6-8 minutes until smooth and elastic. The dough should look satiny and spring back when pressed.
- Cover the dough and let it rise 1 hour until doubled in size. It should noticeably expand and feel lighter.
- Divide the dough into 12 balls and place them in a greased 9x13-inch pan, then cover and let rise 30 minutes until puffy. They should look swollen and close together.
- Preheat the oven to 375F, then bake the rolls 18-20 minutes until golden brown. Use the color—deep golden edges are the cue.
- Stir melted butter with minced garlic and chopped parsley, then brush generously over the hot rolls. Coat the tops so they look glossy and lightly speckled with herbs.
- Sprinkle flaky sea salt over the warm rolls and serve right away. The flakes should catch on the butter-coated surface.