Silky dairy free vanilla ice cream is one of those desserts that disappears fast because it tastes clean, cold, and rich without leaning on dairy to get there. The texture lands somewhere between classic scoop shop ice cream and the softest frozen custard, with a pure vanilla finish that makes every spoonful feel familiar and fresh at the same time.
The trick is giving the coconut milk a little help from arrowroot or tapioca starch, which keeps the base from freezing icy. I also cook the mixture just long enough to dissolve the sugar and activate that starch before chilling it down completely. That small step matters; if the base goes into the machine warm or under-thickened, the final texture turns loose and grainy instead of smooth.
Below, I’ve included the one place people usually go wrong with non-dairy ice cream, plus the swaps that work best if you want to use maple syrup or a different plant milk. The method is simple, but the details are what give you a scoop that holds together cleanly.
The base thickened just enough on the stove, and after chilling overnight it churned into the creamiest dairy-free ice cream I’ve made. It scooped beautifully after a couple hours in the freezer and didn’t get icy like my other versions.
Save this dairy free vanilla ice cream for the nights when you want a creamy vanilla scoop with no dairy and no ice crystals.
The Reason This Base Stays Creamy Instead of Turning Icy
Non-dairy ice cream fails most often because the base is too thin, too cold going into the churn, or missing the stabilizing power that dairy usually provides. Here, the full-fat coconut milk gives you body and fat, while the starch adds just enough structure to keep water from freezing into hard crystals.
The other thing working in your favor is the brief stovetop cook. You’re not trying to boil the mixture hard; you’re just dissolving the sugar and letting the starch thicken the base slightly. If you rush past that point, the final ice cream can churn up loose and freeze into a gritty scoop.
- Full-fat coconut milk — This is the backbone of the recipe. Use the canned version, not carton coconut milk, or the base will freeze too thin and taste flat.
- Arrowroot or tapioca starch — This is what gives the ice cream a smoother, less icy finish. Arrowroot stays a little cleaner tasting, while tapioca can make the texture slightly more elastic; both work.
- Maple syrup — If you use it instead of granulated sugar, the flavor gets deeper and a little warmer. The tradeoff is a softer freeze, so plan on a shorter final freeze time.
- Coconut oil — This adds richness and helps the base stay scoopable. Don’t skip it if you want that fuller mouthfeel that makes the ice cream feel less like a sorbet with vanilla in it.
What Each Ingredient Is Actually Doing in This Ice Cream

- Base ingredient (cream, milk, or custard) — This provides the foundation and richness. Quality matters.
- Sweetener (sugar, honey, or condensed milk) — This sweetens and prevents ice crystals. The ratio is critical.
- Flavor element (vanilla, fruit, chocolate, or other) — This defines the ice cream personality. Use quality ingredients.
- Egg yolks (if making custard base) — These create richness and silky texture. Optional but elevates ice cream.
- Churning (if using ice cream maker) — This incorporates air and prevents ice crystals. Critical for smooth texture.
- Freezing temperature and time — Proper freezing prevents rock-hard texture. Store at 0°F or below.
- Mix-ins (chocolate, cookies, fruit, or swirls) — These add texture and prevent one-dimensional flavor. Add near end of churning.
- Serving temperature (slightly soft, not rock hard) — This provides creamy mouthfeel. Remove from freezer 5 minutes before serving.
What Happens in the Pan Before It Becomes Ice Cream
Whisking the Base Until It Looks Unified
Start with the coconut milk, sugar, starch, vanilla, salt, and coconut oil in a saucepan and whisk until the mixture looks smooth and glossy. The starch needs to be fully dispersed before heat hits the pan, or you’ll get little thickened bits that never fully dissolve. If the coconut milk has separated in the can, whisk until it comes back together before you turn on the burner.
Cooking Just Enough to Wake Up the Starch
Heat over medium, whisking constantly, until the sugar dissolves and the mixture thickens slightly, about 5 minutes. You’re looking for a light coating on the spoon, not pudding. If it starts to bubble aggressively, the heat is too high and the coconut milk can take on a cooked flavor before the starch has done its job.
Cooling Hard Before Churning
Set the pan in an ice bath and cool the base completely, then refrigerate for at least 4 hours. Churning a warm base makes softer ice cream that takes longer to set, and that extra time is when ice crystals have the chance to grow. The base should feel cold all the way through before it goes into the machine.
Churning and Setting the Scoop
Churn according to your machine’s instructions until the texture looks like soft-serve and the paddle starts to leave clear ridges. Transfer it to a freezer-safe container and freeze until scoopable, about 2 hours. If it freezes rock hard, it usually means the base needed a touch more cooking time or a longer chill before churning.
How to Adapt This for Different Kitchens and Different Sweeteners
Maple-Sweetened Version
Swap the granulated sugar for maple syrup for a softer, slightly more caramel-like ice cream. The flavor gets deeper, but the base may freeze a little less firmly, so give it an extra 30 to 45 minutes in the freezer before serving.
Vegan Vanilla Bean Version
Use pure vanilla extract as written, or swap in the seeds from one vanilla bean for a more speckled, bakery-style finish. Vanilla bean gives a stronger aroma, but it won’t change the texture the way extra extract can if you overdo it.
Lighter Coconut Flavor
If you want the vanilla to stand out more, use one can of full-fat coconut milk and one can of unsweetened coconut cream with no added flavoring. The result is still rich, but the coconut note pulls back a little and the vanilla comes forward.
Storage and Reheating
- Refrigerator: Not applicable once churned; keep the finished ice cream in the freezer, not the fridge.
- Freezer: Store in a tightly sealed container for up to 2 weeks. It will harden over time, which is normal for dairy-free ice cream.
- Reheating: Not applicable. Let it sit at room temperature for 5 to 10 minutes before scooping. The common mistake is trying to force the scoop through it straight from the freezer, which can make the texture seem harder than it really is.
Answers to the Questions Worth Asking
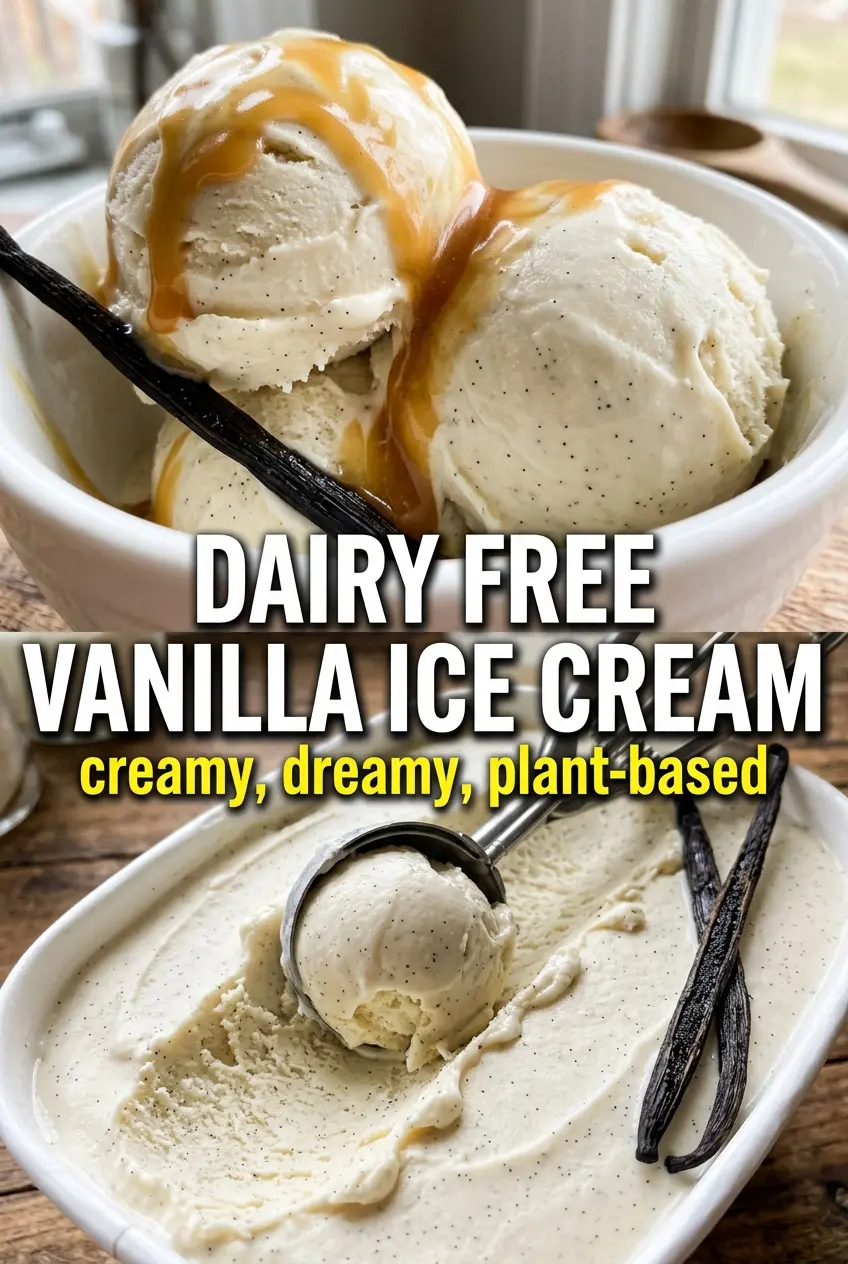
Dairy Free Vanilla Ice Cream
Ingredients
Equipment
Method
- Whisk full-fat coconut milk, granulated sugar (or maple syrup), arrowroot (or tapioca starch), pure vanilla extract, salt, and coconut oil together in a saucepan until smooth.
- Heat over medium heat, whisking constantly, until the sugar dissolves and the mixture thickens very slightly—about 5 minutes, with a glossy look.
- Remove from heat and cool completely over an ice bath, stirring occasionally until no longer warm to the touch.
- Transfer the mixture to the refrigerator and chill at least 4 hours, until cold and thick enough to hold shape briefly on a spoon.
- Churn in an ice cream maker according to the manufacturer’s instructions until the texture looks like soft-serve.
- Transfer to a container and freeze until scoopable—about 2 hours, until firm around the edges but still scoopable in the center.