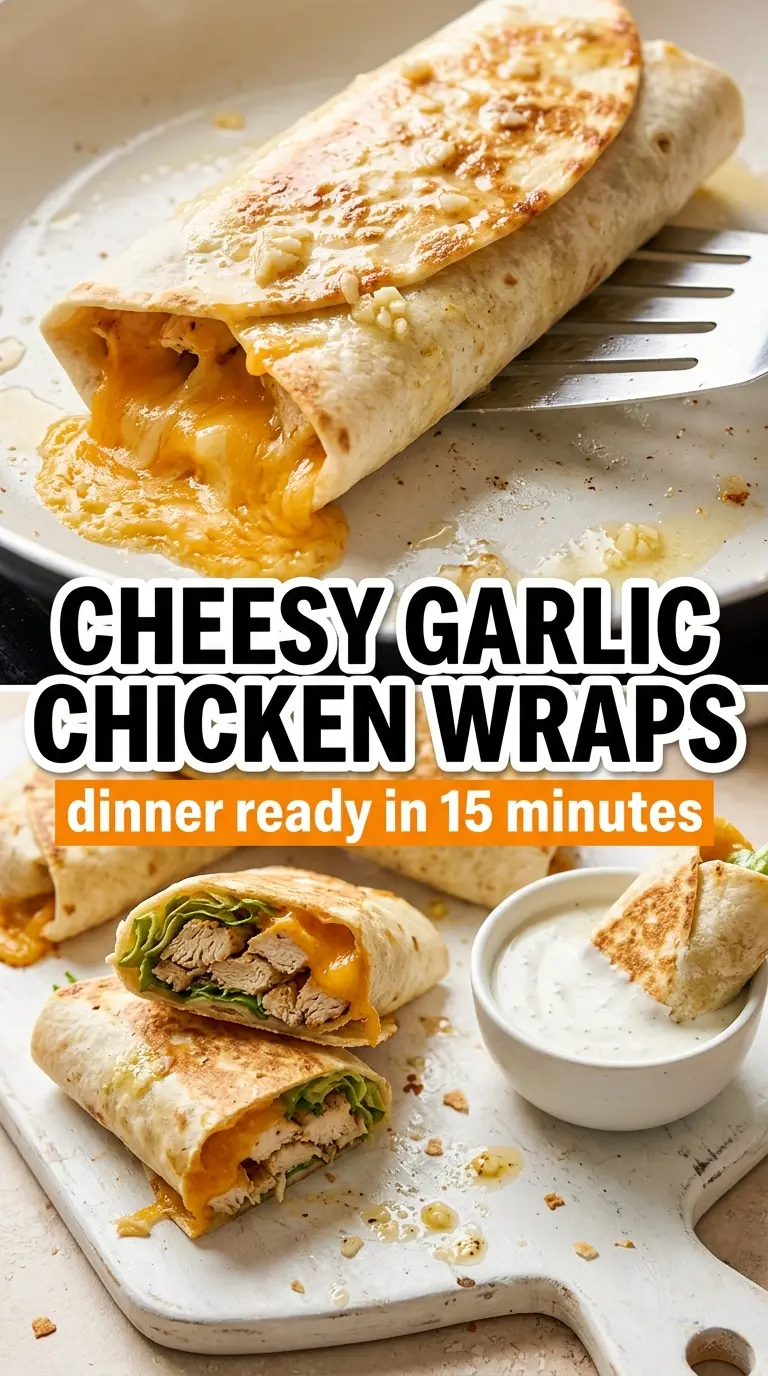
Golden-toasted tortillas wrapped around garlicky chicken and melty mozzarella hit that sweet spot between a grilled sandwich and a proper dinner. The outside gets crisp and deeply browned, while the inside stays creamy, juicy, and just fresh enough from the romaine and tomatoes to keep every bite balanced. When a wrap can be picked up cleanly and still gives you a cheese pull at the cut edge, you know it earned a spot in the regular rotation.
This version works because the chicken gets seasoned and cooked first, then coated in garlic butter off the direct heat. That keeps the garlic from turning bitter and gives the filling a richer finish without making the wrap greasy. The second key is letting the tortilla toast seam-side down long enough to seal and crisp before you flip it. That step is what keeps the whole thing from unraveling on the plate.
Below, I’ve included the small technique details that matter most, plus a few ways to change the filling without losing the texture that makes these wraps good in the first place.
The garlic butter coated the chicken perfectly and the tortillas crisped up without falling apart. I added a little extra mozzarella and the cheese stretch was exactly what I was hoping for.
Cheesy Garlic Chicken Wraps with that golden toasted crust and cheese pull are perfect for the nights when you want dinner to feel like a grilled sandwich.
The Crisp-Seam Trick That Keeps These Wraps Together
The filling here is sturdy, but the wrap still lives or dies by the way it’s assembled. If you overfill it, the tortilla splits before the cheese has a chance to bind everything together. If you toast it too fast, the outside browns before the mozzarella melts, and you end up with a dry, loose wrap instead of one clean slice.
The seam-side-down toast is the part most people rush. Give that first side a full couple of minutes in the pan so the tortilla tightens and seals before you turn it. That short pause is what gives you a wrap that holds its shape when you cut it, which matters just as much as the flavor.
- Warm tortillas first — Cold tortillas crack when you roll them. Heat them just until flexible in a dry skillet or microwave so they fold without tearing.
- Cook the chicken to just 165°F — Pull it as soon as it’s done. Chicken breasts dry out fast, and they’ll keep cooking a little once they hit the garlic butter.
- Toast on medium, not high — You want a steady, even browning. High heat burns the outside before the cheese softens.
What Each Ingredient Is Actually Doing in This Wrap
- Flour tortillas — Large 10-inch tortillas give you enough surface area to roll tightly without crowding the filling. Smaller tortillas work in a pinch, but they’re harder to seal and more likely to split when toasted.
- Chicken breasts — Strips cook quickly and stay tender as long as you don’t overcook them. Thighs can be used for a richer result, but they’ll release more moisture, so pat them dry before they hit the pan.
- Butter and garlic — This is the backbone of the wrap’s flavor. The butter carries the garlic across the chicken and gives the filling that glossy finish, but the garlic needs only a minute; longer than that and it can taste sharp or bitter.
- Mozzarella — Mozzarella melts into those stretchy strands that make the wrap feel complete. A low-moisture shredded mozzarella melts best here; fresh mozzarella brings too much water and can make the tortilla soggy.
- Romaine and cherry tomatoes — These add crunch and freshness so the wrap doesn’t eat like pure cheese and chicken. Keep them dry after washing, because extra moisture is the quickest way to soften the tortilla.
- Ranch or Caesar dressing — Use just enough to coat the tortilla and season the filling. Too much dressing makes the wrap slippery, and then the filling slides out instead of staying tucked in.
Building the Garlic Butter Filling Without Drying the Chicken
Getting the Chicken Golden First
Start with the chicken in a hot skillet and leave it alone long enough to pick up color. That browned surface gives the filling more flavor than steaming it ever could. Cut the strips evenly so they finish at the same time; thin pieces will dry out before thicker ones are cooked through. When the chicken hits 165°F, pull it right away and move on.
Turning Butter and Garlic Into the Sauce
Use the same pan and drop the heat back a little before the garlic goes in. The pan still holds enough heat to perfume the butter fast, and that’s all you want. Stir constantly for about a minute, just until the garlic smells sweet and mellow. If it starts to brown, the heat is too high and the flavor turns harsh.
Rolling and Toasting the Wraps
Spread the dressing in a thin layer so the tortilla gets flavor without getting slick. Add the cheese first, then the chicken, then the lettuce and tomatoes, and roll tightly with the sides tucked in. Place the wrap seam-side down in the skillet and let it sit until that underside is deeply golden. Flip once and toast the second side until the cheese has melted and the wrap feels firm when you press it gently with a spatula.
How to Adapt These Wraps for Different Nights
Make It with Chicken Thighs
Boneless thighs work well if you want a juicier filling. They take a little longer to cook and won’t dry out as fast as breasts, but they do release more fat, so drain off any excess before adding the garlic butter. The result is richer and a little more forgiving.
Gluten-Free Wrap Version
Use sturdy gluten-free tortillas that are meant for folding, not the delicate kind that crack when they warm up. Heat them gently and roll them a little looser than you would a flour tortilla, since they’re less elastic. They won’t brown quite the same, but the filling still carries the recipe.
Swap the Dressing
Ranch gives you a cool, herby base, while Caesar adds a saltier, more savory finish. Either one works, but keep the layer thin so the wrap stays crisp. If you use a thicker dressing, thin it with a teaspoon of milk or water so it spreads evenly.
Turn It Into a Meal Prep Lunch
These wraps hold best if you keep the lettuce and tomatoes separate until serving. Cook the chicken and garlic butter ahead, then assemble and toast the wraps fresh when you’re ready to eat. That keeps the tortilla from turning soft and gives you a much better texture.
Storage and Reheating
- Refrigerator: Store leftovers for up to 3 days, wrapped tightly or in an airtight container. The tortilla will soften a bit, especially where the dressing sits.
- Freezer: These don’t freeze well once assembled because the lettuce and tomatoes lose their texture. Freeze only the cooked garlic chicken if you want to get ahead.
- Reheating: Reheat in a skillet over medium-low heat so the tortilla crisps back up before the filling overheats. The microwave will warm it, but it turns the wrap soft and can make the cheese greasy.
Questions I Get Asked About This Recipe

Cheesy Garlic Chicken Wraps
Ingredients
Equipment
Method
- Season chicken strips with salt and pepper. Cook chicken in 2 tablespoons butter in a skillet over medium-high heat for 5-6 minutes until golden and cooked through to 165°F.
- In the remaining 2 tablespoons butter, cook garlic for 1 minute until fragrant. Toss cooked chicken strips in the garlic butter, then stir in fresh parsley.
- Warm tortillas until pliable. Spread ranch dressing over each tortilla.
- Layer shredded mozzarella, garlic chicken strips, romaine, and cherry tomatoes over the dressed tortillas. Roll tightly.
- Toast wraps seam-side down in a skillet over medium heat for 2 minutes per side until golden and cheese is melted. Slice diagonally and serve immediately.