Baked mac and cheese should land on the table with a spoonable center, a browned top that crackles a little at the edges, and enough cheese stretch to make everyone at the table lean in. This version does that without turning gluey or grainy, which is where a lot of baked pasta recipes go wrong. The sauce stays creamy after baking, and the pasta holds its shape instead of disappearing into the cheese.
The key is building a proper stovetop sauce before the pasta ever hits the dish. A quick roux gives the milk something to cling to, while evaporated milk adds body and helps the sauce stay silky in the oven. Sharp cheddar brings the punch, Gruyere or Colby jack fills in the melt, and a little dry mustard and smoked paprika keep the flavor from tasting flat.
Below you’ll find the timing that keeps the pasta from softening too much, the cheese order that gives you a smoother sauce, and a few smart swaps if you need to adapt the dish without losing that baked, bubbling finish.
The sauce stayed creamy after baking and the top came out perfectly browned. I liked that the pasta still had a little bite instead of turning soft, and the leftovers reheated without getting greasy.
Save this baked mac and cheese for when you want a creamy stovetop sauce, a golden cheese crust, and pasta that still has bite after baking.
The Secret to Baked Mac and Cheese That Stays Creamy After the Oven
The mistake most baked mac and cheese recipes make is relying on the oven to finish the sauce. By the time the top browns, the dairy underneath has spent too long heating and the cheese can turn grainy or oily. This version solves that by getting the sauce thick and smooth on the stovetop first, then baking it just long enough to fuse everything together.
Undercooking the pasta by two minutes matters more than people think. The noodles keep absorbing sauce in the oven and during the rest time, so if they start out fully cooked, the final texture slides from tender into mushy. The rest after baking is just as important, because the sauce settles and thickens enough to coat the pasta instead of running across the plate.
- Simmer, don’t boil, the sauce after the milk goes in. A hard boil can make the flour base seize or scorch on the bottom before it has time to thicken evenly.
- Use the pasta shape that traps sauce. Elbows are classic because the curves hold cheese in every bite. Long noodles don’t work the same way here.
- Let the casserole rest before serving. If you cut into it straight from the oven, it looks loose. Ten minutes gives the cheese sauce time to set into that creamy, scoopable texture.
What the Cheese Mix Is Really Doing Here

- Sharp cheddar brings the bold, familiar mac and cheese flavor. Pre-shredded cheddar works in a pinch, but block cheese melts smoother because it doesn’t carry the anti-caking starch that can make the sauce feel a little pasty.
- Gruyere or Colby jack softens the sharpness and improves the melt. Gruyere adds a nutty edge; Colby jack gives you a milder, silkier finish. Either one helps the sauce stretch without becoming stringy in a bad way.
- Evaporated milk is the quiet insurance policy in this recipe. It has concentrated milk solids, so the sauce tastes richer and holds together better after baking than using only regular milk.
- Dry mustard and smoked paprika don’t make the dish taste mustardy or smoky. They deepen the cheese flavor and keep the sauce from tasting one-note.
Building the Sauce Before the Pasta Goes In
Making the Roux
Melt the butter, whisk in the flour, and let it cook for about a minute until it smells a little nutty and looks smooth, not sandy. That short cook takes the raw edge off the flour and keeps the finished sauce from tasting chalky. If the roux turns brown before you add the milk, the heat was too high and the sauce can taste toasty instead of clean and creamy.
Whisking in the Dairy
Add the milk slowly while whisking constantly so the roux dissolves into a lump-free base. The mixture will look thin at first, then turn glossy and start coating the whisk after a few minutes of gentle simmering. If you dump the milk in all at once, you’re more likely to get flour pockets that never fully smooth out.
Melting the Cheese Without Breaking It
Take the pan off the heat before the cheese goes in, or at least lower the burner to the faintest heat possible. Stir in the cheddar and Gruyere a handful at a time until the sauce is fully melted and velvety. High heat is what makes cheese sauce grainy, because the proteins tighten and separate instead of melting into the dairy.
Baking to the Right Finish
Fold in the pasta, pour everything into the dish, and top with the remaining cheese so the surface bakes into a browned lid. The casserole is done when the edges are bubbling and the top has golden patches, not when the whole pan looks dry. Pull it from the oven before the cheese layer turns dark brown, because it keeps cooking for a few minutes as it rests.
How to Adapt This Baked Mac and Cheese Without Losing the Creamy Finish
Gluten-Free Version
Use your favorite gluten-free elbow pasta and swap the flour for a 1:1 gluten-free baking blend. The sauce will thicken a little differently, so let it simmer until it lightly coats the back of a spoon before the cheese goes in. The finished dish still bakes up creamy, but gluten-free pasta softens faster, so check it at the low end of the baking time.
Dairy-Light Swap for a Milder Pan
You can replace the Gruyere with Colby jack and use 2% milk instead of whole milk, but the sauce will be a little less plush. The evaporated milk helps keep it stable, so don’t skip that. This version still tastes rich, just with a softer cheese flavor and a lighter finish.
Breadcrumb Topping for More Crunch
If you want a firmer top, mix 1 cup fine breadcrumbs with 2 tablespoons melted butter and sprinkle it over the cheese before baking. It gives you a more toasted, casserole-style crust and less of that pure cheese lid. Keep an eye on it near the end, because breadcrumbs brown faster than cheese.
Make-Ahead and Reheat
Assemble the dish up to a day ahead, cover it, and refrigerate it before baking. If it goes into the oven cold, add a little extra time so the center heats through without drying out the edges. Leftovers keep well and reheat best with a splash of milk over low heat or in the oven covered with foil.
Questions I Get Asked About This Recipe
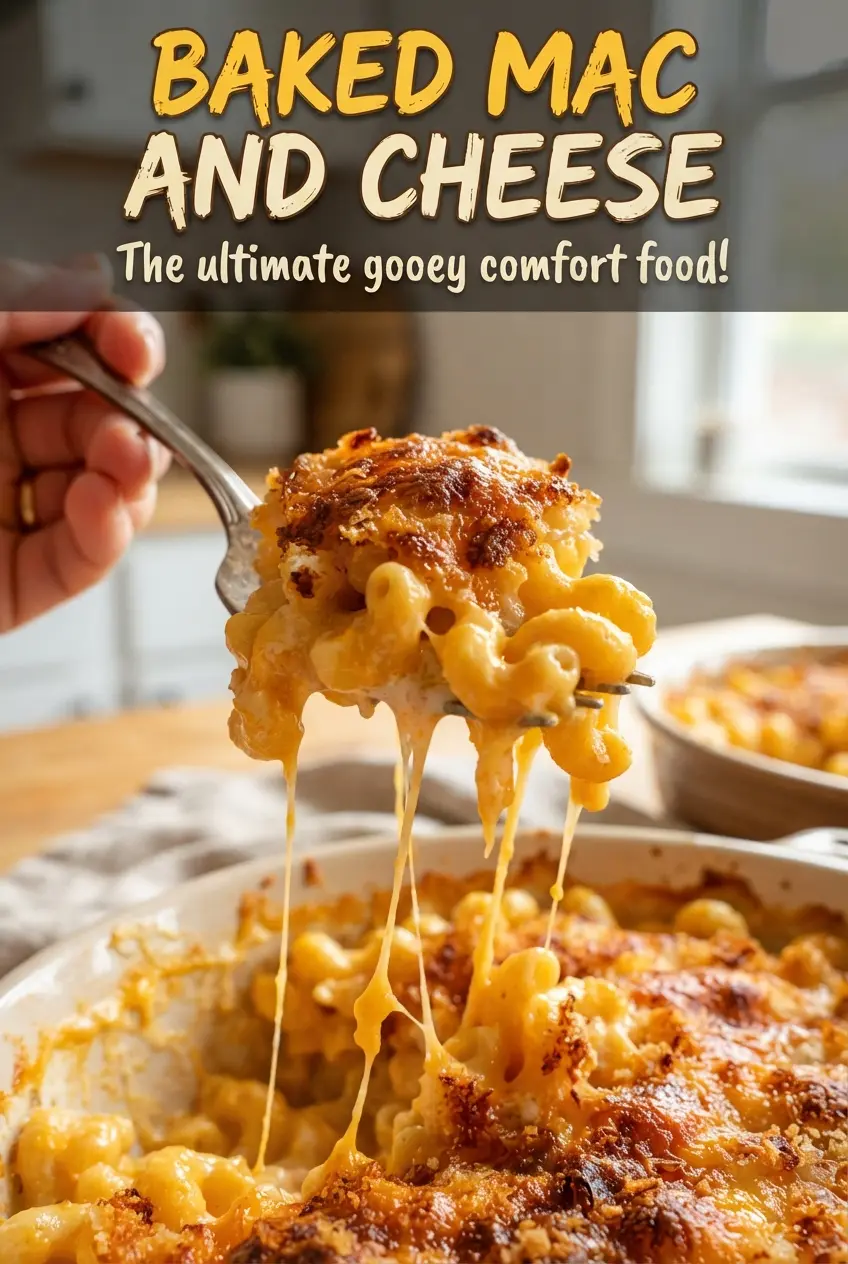
Baked Mac and Cheese
Ingredients
Equipment
Method
- Preheat the oven to 350F and butter a 9x13-inch baking dish so the mac and cheese releases easily.
- Cook the elbow macaroni 2 minutes less than package directions, then drain so it finishes cooking in the oven.
- Melt the butter in a pot, then whisk in the all-purpose flour and cook for 1 minute to remove the raw flour taste.
- Slowly whisk in the whole milk and evaporated milk until smooth.
- Simmer the mixture for 5-6 minutes until thickened, then season with salt, black pepper, dry mustard, and smoked paprika.
- Stir in 3 cups shredded sharp cheddar and 1 1/2 cups Gruyere/Colby jack until melted, then fold in the drained pasta.
- Pour the mixture into the prepared dish and top with the remaining cheeses.
- Bake for 25-30 minutes at 350F until bubbly and golden.
- Rest for 10 minutes before serving so the sauce sets slightly for cleaner slices.