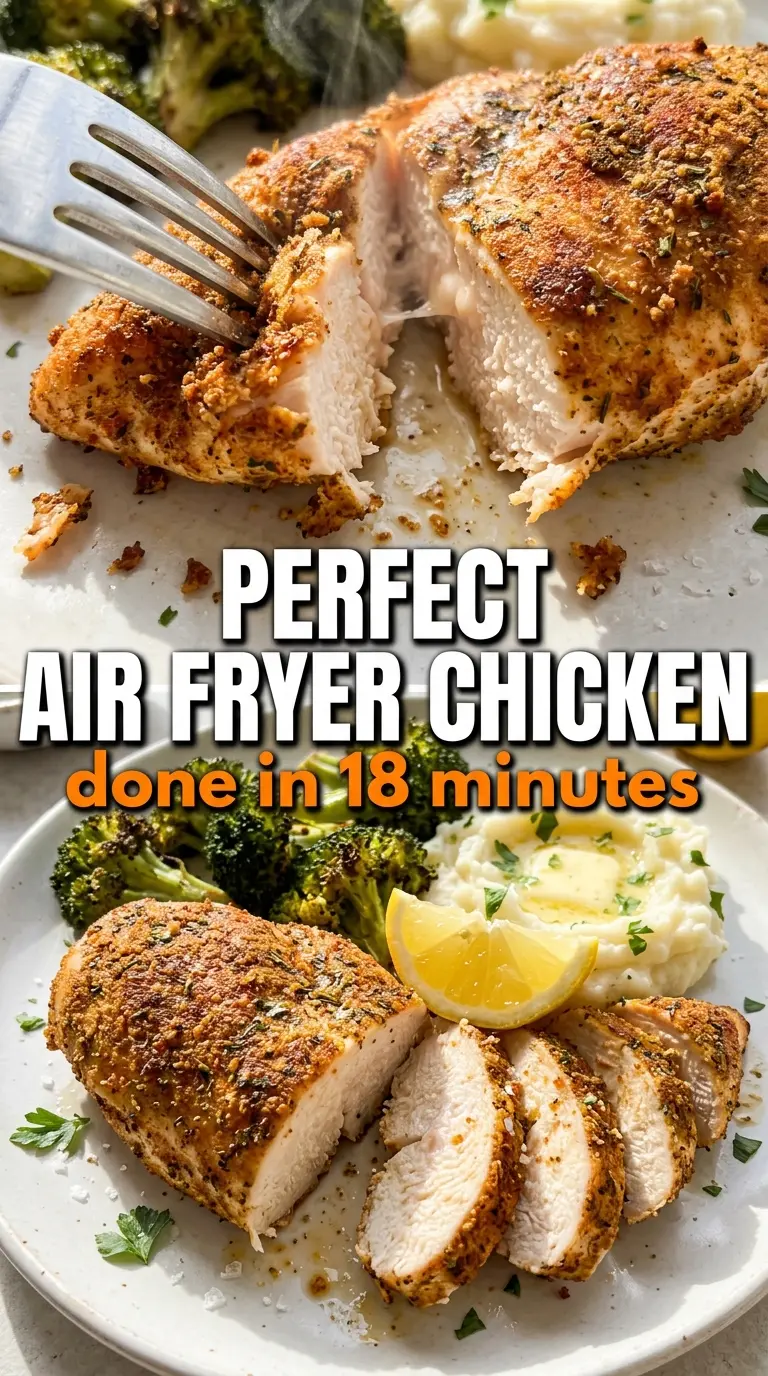
Air fryer chicken breasts come out with a browned, seasoned crust and a juicy center that stays tender instead of dry and stringy. The air fryer moves hot air fast enough to give you that roasted, almost grilled edge in under 20 minutes, which is exactly why this recipe earns a spot in the weeknight rotation.
The trick is treating the chicken like a cutlet, not a giant thick breast. Pounding it to an even thickness keeps the thinner end from drying out before the center is done, and a quick spice rub with paprika, garlic, and onion powder gives the outside enough character to taste like more than plain chicken. A little oil helps the seasoning cling and encourages that golden finish.
Below, I’ll walk through the one step most people skip that makes the biggest difference, plus a few smart ways to change the seasoning without losing that juicy texture.
The chicken stayed juicy all the way through, and the outside had that nice seasoned crust without turning leathery. I loved that it was done in under 20 minutes and sliced beautifully for dinner salads the next day.
Juicy air fryer chicken breasts with a golden crust are perfect when you need dinner fast without drying out the meat.
The Secret to Keeping Air Fryer Chicken Breasts Juicy Instead of Stringy
The biggest mistake with air fryer chicken breasts is chasing color before the meat has had time to cook evenly. Thick chicken breasts are uneven by nature, and the outside can look done while the center is still behind. Pounding them to a steady thickness solves that problem better than any extra marinade ever will.
There’s also a timing detail that matters: the chicken should come out when it hits 165°F, then rest before slicing. If you cut too early, the juices run straight onto the board and the meat turns dry fast. The rest lets the fibers relax and reabsorb some of that moisture.
- Even thickness — This is what keeps the thinner side from going dry before the middle is safe to eat.
- Olive oil — It helps the spices stick and gives the surface enough fat to brown instead of looking dusty.
- Smoked paprika — Regular paprika works, but smoked paprika adds a deeper, more roasted edge that makes the chicken taste cooked longer than it actually has been.
- Fresh lemon at the end — A squeeze over the sliced chicken wakes everything up after cooking and keeps the seasoning from tasting flat.
What Each Seasoning Is Doing on the Chicken
Garlic powder and onion powder build the savory backbone without burning the way fresh garlic can in a hot air fryer. Italian seasoning adds the herbs that make the chicken taste finished, not plain. Smoked paprika gives the crust that warm color and a little edge of smoke.
Chicken breasts themselves matter too. Smaller breasts cook faster and stay juicier, while very large ones can get tough if they’re not pounded down first. If yours are especially thick, split them horizontally or pound them gently with a meat mallet between sheets of plastic wrap until they’re even at about 3/4-inch.
- Chicken breasts — Use boneless, skinless breasts and even them out so the air fryer cooks them at the same pace from end to end.
- Olive oil — A thin coating is enough. Too much oil can make the seasoning slide off instead of forming a seasoned crust.
- Italian seasoning — Dried herbs are the right call here because they stand up to the dry, fast heat of the air fryer.
- Parsley and lemon wedges — These are serving ingredients, but they matter because they cut through the richness and brighten the finish.
Getting the Heat, Timing, and Rest Right
Preheating the Air Fryer
Preheat the air fryer to 390°F before the chicken goes in. That hot start helps the outside set quickly, which gives you better color and less stickiness. If you skip the preheat, the chicken spends too long warming up in a lukewarm basket and the surface can dry out before it browns.
Seasoning for a Real Crust
Brush both sides with oil, then rub on the spice mix evenly. You want a thin, even coating, not clumps, because clumps can scorch while the rest of the chicken stays pale. Press the seasoning in lightly with your hands so it actually adheres when the fan starts moving air around.
Cooking Until the Center Hits 165°F
Arrange the breasts in a single layer with a little space between them. Air needs room to move, or you end up steaming the chicken instead of crisping it. Flip halfway through and start checking temperature near the end of the cook time; pull the chicken as soon as it reaches 165°F in the thickest part.
Resting Before Slicing
Let the chicken rest for 5 minutes on a plate or cutting board. This is the difference between juicy slices and a puddle of lost juices. Slice against the grain after resting, and the meat will feel tender instead of chewy.
How to Change the Seasoning Without Losing the Juicy Texture
Make It Garlic-Parmesan Style
Add 2 tablespoons finely grated Parmesan to the seasoning mix and finish the hot chicken with an extra sprinkle after cooking. Parmesan brings salt and a little nuttiness, but it can brown fast, so keep it light if you want the crust to stay clean and not taste burnt.
Make It Dairy-Free and Gluten-Free Without Any Fuss
This recipe is naturally both dairy-free and gluten-free as written, which is one reason it’s such an easy dinner to keep in rotation. Just check your seasoning blends if you use a store-bought Italian seasoning, since some versions include anti-caking agents or hidden additives.
Turn It Into a Meal Prep Protein
Cool the chicken completely before slicing and storing it in shallow containers. Sliced chicken reheats faster and stays more tender than whole pieces, which matters when you’re using it for salads, grain bowls, wraps, or quick lunches.
Swap the Seasoning for a Spicier Finish
Add 1/4 to 1/2 teaspoon cayenne or a pinch of red pepper flakes to the rub. That brings heat without changing the cooking method, but don’t overload the surface or the spice can overshadow the browned chicken flavor instead of supporting it.
Storage and Reheating
- Refrigerator: Store in an airtight container for up to 4 days. The crust softens a little, but the chicken stays great for slicing and reheating.
- Freezer: Freeze cooked, cooled chicken breasts whole or sliced for up to 3 months. Wrap tightly and thaw in the refrigerator before reheating so they don’t dry out.
- Reheating: Warm in the air fryer at 350°F for 3 to 5 minutes, just until heated through. The common mistake is blasting them too long, which turns the lean meat chalky fast.
Questions I Get Asked About This Recipe

Air Fryer Chicken Breasts
Ingredients
Equipment
Method
- Preheat the air fryer to 390°F so it reaches temperature quickly for even browning.
- Pound the chicken breasts to an even 3/4-inch thickness if needed for uniform cooking and consistent doneness.
- Brush both sides of the chicken with olive oil for a flavorful, crisp exterior.
- Mix garlic powder, onion powder, smoked paprika, Italian seasoning, salt, and cracked black pepper, then rub evenly over both sides of the chicken.
- Air fry the chicken for 16-18 minutes, flipping halfway through, until the internal temperature reaches 165°F and the outside is golden-brown.
- Rest the chicken for 5 minutes before slicing to let the juices redistribute and stay tender.
- Garnish with fresh parsley and serve with lemon wedges for bright, fresh contrast to the caramelized crust.