
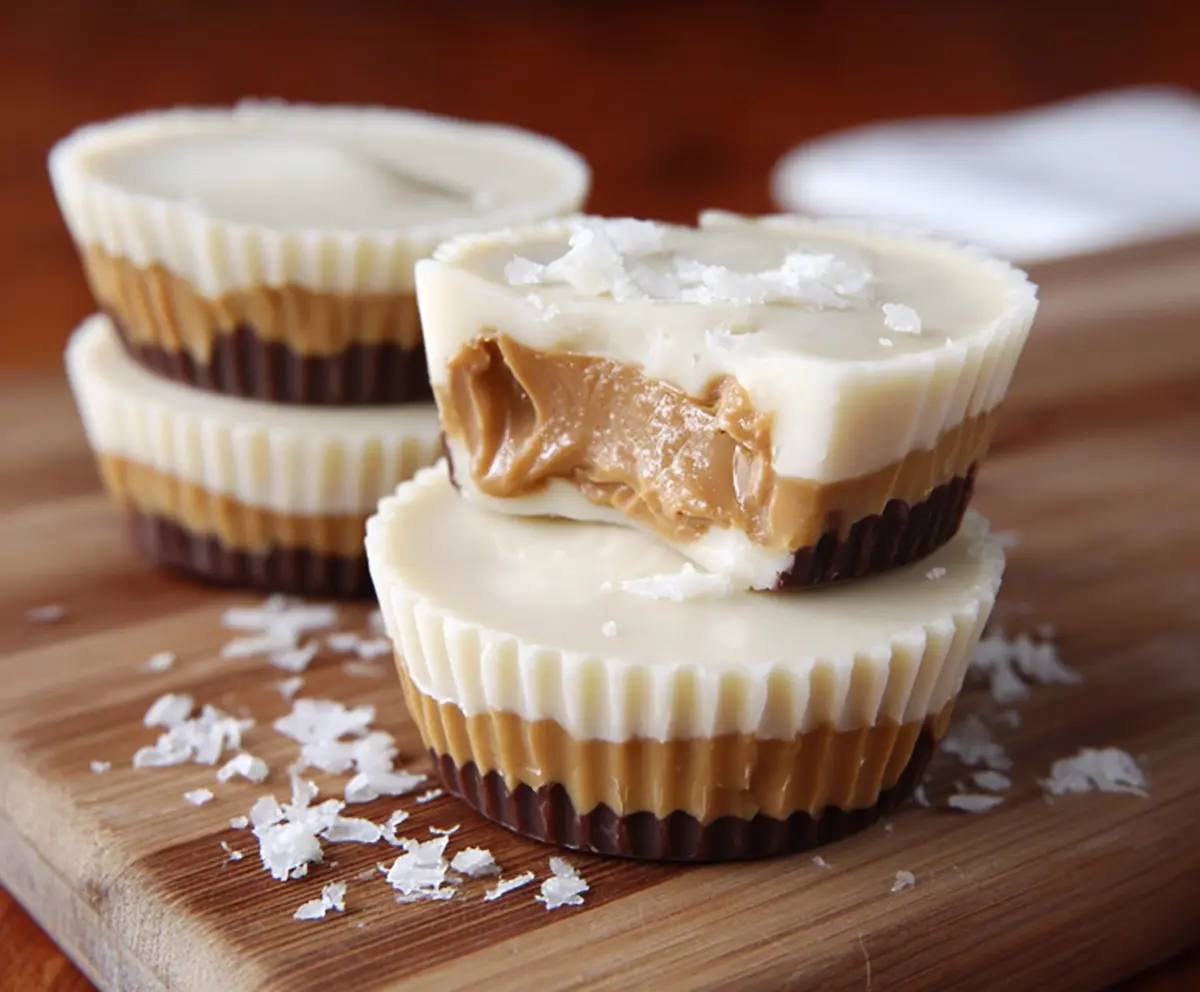
White Chocolate Peanut Butter Cups are a delicious twist on the classic treat, combining creamy white chocolate with rich, smooth peanut butter. The sweet and nutty flavors come together in perfect harmony, making each bite melt delightfully on your tongue. They’re simple yet incredibly satisfying little candies that anyone with a sweet tooth will adore.
I love making these at home because they’re so easy to customize. Sometimes I add a pinch of sea salt on top to bring out the peanut butter’s flavor even more. It’s always fun to wrap them up and share with friends or keep a stash ready for when you need a little sweet pick-me-up during the day.
One of my favorite ways to enjoy them is slightly chilled, so they have a bit of a firm snap but still soften quickly when you bite in. They’re great for parties, gifts, or just a cozy night in. Every time I make them, I catch myself sneaking “just one more” until the batch disappears—definitely a good problem to have!
Key Ingredients & Substitutions
White Chocolate: Choose good-quality white chocolate chips or bars. They melt smoothly and give a nice texture. If you can’t find white chocolate, white candy melts work too, but taste may be a bit sweeter and less creamy.
Peanut Butter: I prefer natural, no-stir peanut butter for a fresh, nutty taste. If allergic or avoiding peanuts, almond butter or sunflower seed butter make tasty swaps.
Powdered Sugar: This sweetens and helps the peanut butter firm up. If you want less sweetness, reduce it slightly or try powdered erythritol for a low-sugar option.
Optional Toppings: Crushed peanuts add crunch, but toffee bits or sprinkles can give fun texture and flavor variety.
How Can I Get Smooth White Chocolate That Doesn’t Clump?
Melting white chocolate can be tricky because it burns or seizes easily. Here are some tips to get it perfect every time:
- Use a microwave-safe bowl and melt in short 20-30 second bursts. Stir well between heating to distribute heat evenly.
- Avoid overheating. Stop microwaving when most is melted, then stir until smooth with residual heat.
- If you prefer, melt over a double boiler (bowl over simmering water) for more control.
- Make sure no water gets into the chocolate or it may seize into grainy lumps.
Equipment You’ll Need
- Mini muffin tin or silicone molds – I like silicone because they’re easy to pop the cups out without breaking them.
- Mixing bowls – perfect for melting chocolate and mixing the peanut butter filling.
- Microwave-safe or double boiler – helps melt the chocolate smoothly without burning it.
- Mini spoon or piping bag – useful for carefully filling each cup with chocolate and peanut butter layers.
- Measuring spoons – keep the layers even with precise measurements.
Flavor Variations & Add-Ins
- Use dark or milk chocolate instead of white for a richer, different-flavor cup.
- Add a pinch of espresso powder to the chocolate or peanut butter for a coffee twist.
- Mix in chopped-up pretzels, caramel bits, or crushed cookies into the peanut butter for added texture.
- Top with sea salt, sprinkles, or chopped nuts for extra flavor and crunch.
White Chocolate Peanut Butter Cups
Ingredients You’ll Need:
Main Ingredients:
- 2 cups white chocolate chips or chopped white chocolate
- ½ cup creamy peanut butter (preferably natural, no-stir)
- 2 tablespoons powdered sugar
- ½ teaspoon vanilla extract (optional)
- Pinch of salt (optional)
- Crushed peanuts or toffee bits for topping (optional)
- Mini cupcake liners or silicone molds
How Much Time Will You Need?
This recipe takes about 15 minutes to prepare plus around 30 minutes chilling time to let the peanut butter cups set properly. So altogether, you’ll be ready to enjoy your treats in about 45 minutes!
Step-by-Step Instructions:
1. Prepare Your Containers:
Line a mini muffin tin with paper cupcake liners or get your silicone molds ready. This will help the peanut butter cups hold their shape nicely.
2. Melt the White Chocolate for the Base:
Put 1 ½ cups of white chocolate into a microwave-safe bowl. Heat the chocolate in 20-30 second bursts, stirring well after each time until it’s smooth and melted.
3. Make the Chocolate Base Layer:
Spoon about 1 teaspoon of the melted white chocolate into the bottom of each liner or mold. Spread it up the edges a little bit. Then, put the tray in the fridge for about 10 minutes so this layer can harden.
4. Prepare the Peanut Butter Filling:
While the base firms up, mix together the creamy peanut butter, powdered sugar, vanilla extract, and a pinch of salt in a bowl. Stir until it’s smooth and creamy.
5. Add the Peanut Butter Center:
Once the chocolate bases have set, gently place about 1 teaspoon of the peanut butter filling onto each one. Press them down lightly but be careful not to spread the filling all the way to the edges.
6. Cover with Remaining White Chocolate:
Now melt the last ½ cup of white chocolate the same way you did before. Spoon this melted chocolate over the peanut butter filling in each cup, making sure to completely cover the peanut butter layer.
7. Add Optional Toppings:
If you like, sprinkle crushed peanuts or toffee bits on top for a little extra crunch and flavor.
8. Chill to Set:
Put the peanut butter cups back in the refrigerator for at least 30 minutes or until they are fully firm.
9. Enjoy!
Once set, peel off the liners and get ready to enjoy your creamy, delicious white chocolate peanut butter cups! Store any extras in an airtight container in the fridge to keep them fresh.
Can I Use Natural Peanut Butter for This Recipe?
Yes! Natural peanut butter works great, just make sure it’s well stirred so the oils are fully combined for a smooth filling.
How Should I Store Leftover Peanut Butter Cups?
Store them in an airtight container in the refrigerator for up to a week. This keeps the white chocolate firm and the peanut butter fresh.
Can I Make These Peanut Butter Cups Ahead of Time?
Absolutely! You can prepare them several days in advance and keep them refrigerated until ready to serve.
What Can I Substitute for White Chocolate?
You can use milk or dark chocolate instead if preferred. Just follow the same melting and layering steps for delicious variations.