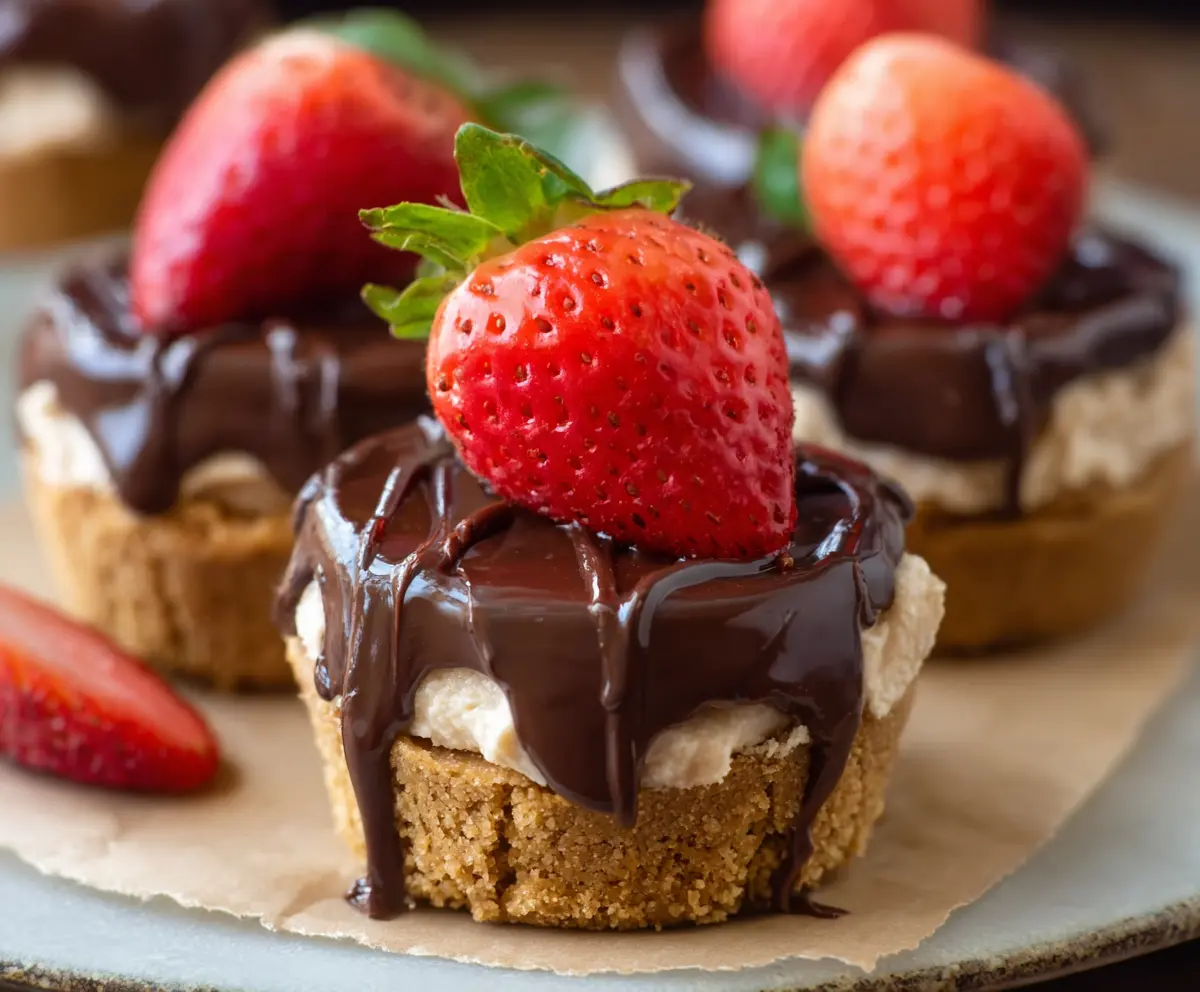
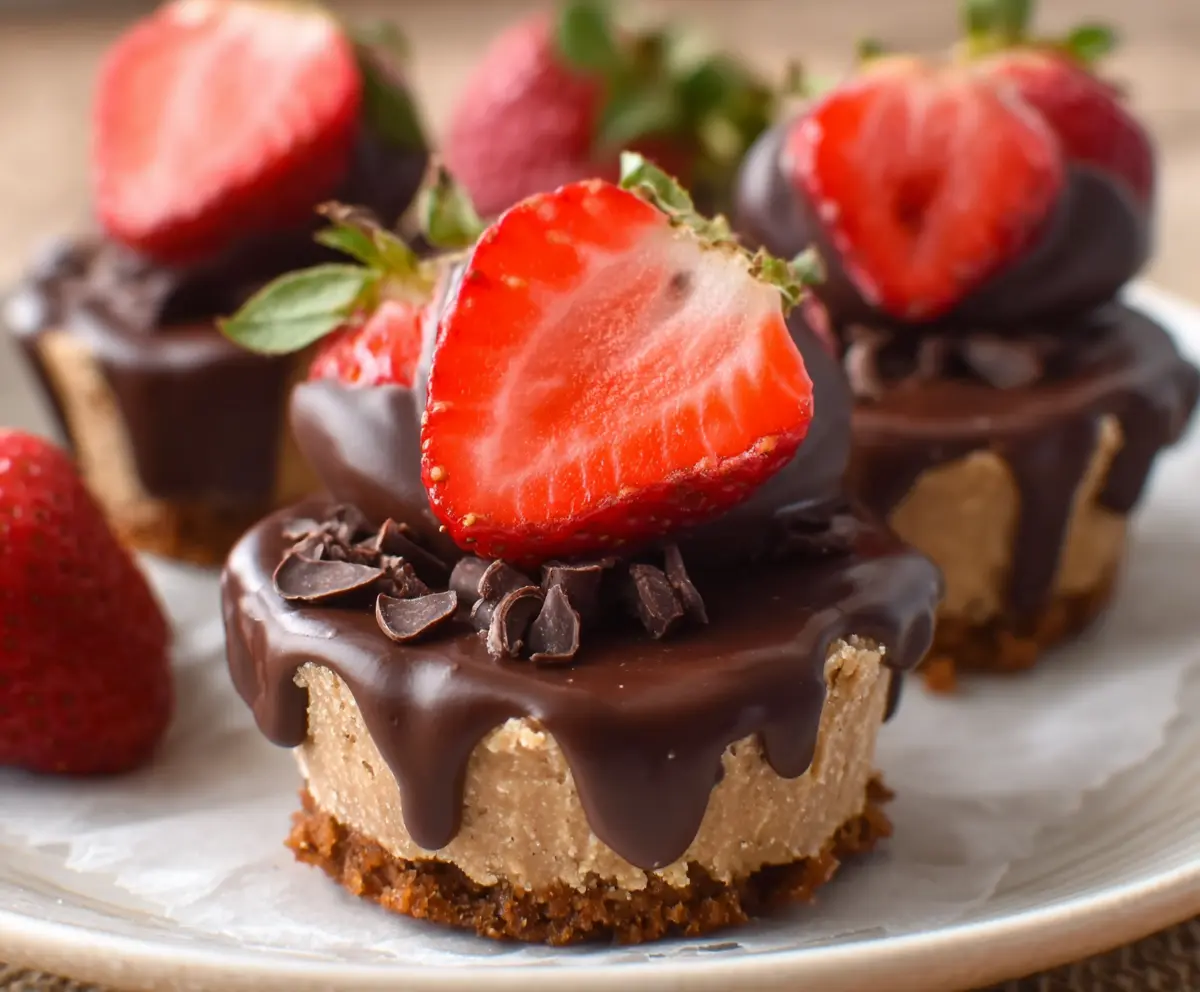
No-Bake Chocolate Covered Strawberry Cheesecake Cups are a sweet little treat that brings together creamy cheesecake, juicy strawberries, and a rich chocolate topping—all in a handy cup! The smooth texture of the cheesecake blends perfectly with the fresh strawberries, while the chocolate adds a fun, crunchy finish.
I love making these cups when I want a dessert that feels fancy but is actually super easy to put together. There’s no oven needed, which means less time standing by the stove and more time enjoying. Plus, who doesn’t enjoy the classic combo of chocolate and strawberries? It’s like a party in every spoonful!
These cups are great for sharing with friends or serving at a casual get-together. I usually chill them for a few hours so the cheesecake sets just right, then top them off with extra strawberry slices before serving. They look inviting and taste even better—always a hit whether it’s a summer day or a cozy night in.
Key Ingredients & Substitutions
Graham cracker crumbs: They create a crunchy base that holds everything together. If you don’t have graham crackers, you can use digestive biscuits, vanilla wafers, or even crushed pretzels for a salty twist.
Cream cheese: This is the heart of the cheesecake filling. Use full-fat cream cheese for the creamiest texture. For a lighter version, try Neufchâtel cheese, but expect a slightly less rich result.
Heavy whipping cream: Whipped cream makes the filling light and fluffy. If you prefer, use coconut cream for a dairy-free option, but it will add a bit of coconut flavor.
Chocolate chips & coconut oil: The chocolate topping is smooth and glossy because of the coconut oil. If you don’t have coconut oil, vegetable oil or butter can work, but coconut oil helps the chocolate set nicely.
Fresh strawberries: Fresh berries add bright, juicy flavor and a pretty garnish. You can swap with raspberries or sliced kiwis if strawberries are out of season.
How Do I Make Sure the Cheesecake Filling is Smooth and Light?
A smooth cheesecake filling comes down to properly mixing and folding:
- Start by beating the softened cream cheese well until no lumps remain. This avoids a grainy texture.
- Add powdered sugar and vanilla, beating until fully incorporated.
- Whip the heavy cream separately until you see stiff peaks—this means the cream holds its shape well.
- Gently fold the whipped cream into the cream cheese mixture using a spatula. Folding preserves the airiness, keeping the filling light and fluffy.
- Take your time with folding—over-mixing can deflate the cream and make the filling dense.
Remember, soft cream cheese and well-whipped cream are key to that perfect creamy texture.
Equipment You’ll Need
- Mini muffin tin or silicone molds – Perfect for making individual cups that are easy to serve and eat.
- Mixing bowls – For preparing the crust and filling; a set with different sizes is handy.
- Electric mixer or hand whisk – To smoothly beat the cream cheese and whip the cream.
- Spatula – Makes folding ingredients together gentle and easy.
- Microwave-safe bowl – For melting the chocolate and coconut oil safely and quickly.
- Measuring spoons and cups – To measure ingredients accurately.
- Plastic wrap or lids – To cover the tray while chilling in the refrigerator.
Flavor Variations & Add-Ins
- Try adding a splash of liqueur, like Grand Marnier or Chambord, into the cheesecake filling for a boozy twist.
- Use dark or white chocolate instead of semi-sweet for different flavor profiles.
- Mix in chopped nuts or crushed cookies into the crust or filling for extra crunch.
- Add a hint of citrus zest—like lemon or orange—to the cheesecake for a fresh, tangy flavor.
No-Bake Chocolate Covered Strawberry Cheesecake Cups
Ingredients You’ll Need:
For the Crust:
- 1 1/2 cups graham cracker crumbs
- 1/4 cup granulated sugar
- 6 tablespoons unsalted butter, melted
For the Cheesecake Filling:
- 8 oz cream cheese, softened
- 1/3 cup powdered sugar
- 1 teaspoon vanilla extract
- 1 cup heavy whipping cream
For the Chocolate Topping:
- 1 cup semi-sweet chocolate chips
- 2 teaspoons coconut oil or vegetable oil
For Garnish:
- Fresh strawberries (about 12 medium-sized)
How Much Time Will You Need?
This recipe takes about 20 minutes to prepare plus at least 2 hours of chilling time in the refrigerator to let the cheesecake cups set properly. It’s mostly hands-off after assembling, making it a simple and refreshing dessert to make ahead.
Step-by-Step Instructions:
1. Prepare the Crusts:
Mix the graham cracker crumbs, granulated sugar, and melted butter in a medium bowl until the texture looks like wet sand. This will create a tasty base for the cheesecake cups.
2. Form the Crusts:
Press about 2 tablespoons of the crumb mixture into the bottom of each cup in a mini muffin tin or silicone mold. Pack it firmly to hold its shape. Put the tray in the fridge to chill and firm up while you make the filling.
3. Make the Cheesecake Filling:
In a large bowl, beat the softened cream cheese until smooth with an electric mixer. Add powdered sugar and vanilla, mixing well. In another bowl, whip the heavy cream until stiff peaks form. Gently fold the whipped cream into the cream cheese mixture to keep it light and fluffy.
4. Assemble the Cups:
Distribute the cheesecake filling evenly over the chilled crusts, smoothing the tops with a spatula. Place back in the fridge while preparing chocolate topping.
5. Prepare the Chocolate Topping:
In a microwave-safe bowl, combine the chocolate chips and coconut oil. Heat in 30-second bursts, stirring after each, until fully melted and smooth.
6. Top and Garnish:
Take the cheesecake cups out of the fridge and spoon the melted chocolate over each one, letting it drip down the sides. Finish by placing a fresh strawberry on top of each cup.
7. Chill and Serve:
Refrigerate the assembled cups for at least 2 hours or until fully set. Serve chilled and enjoy the creamy, chocolatey, and fruity flavors!
Can I Use Frozen Strawberries for This Recipe?
It’s best to use fresh strawberries for the topping to keep the texture and flavor bright. If you only have frozen, thaw them completely and pat dry to avoid extra moisture that can affect the chocolate and cheesecake.
How Long Can I Store These Cheesecake Cups?
Store leftovers in an airtight container in the refrigerator for up to 3 days. The crust may soften slightly over time, but the flavors remain delicious. Serve chilled for the best texture.
Can I Make These Ahead of Time?
Absolutely! These cheesecake cups actually taste better after chilling overnight because the flavors have time to meld and the filling firms up nicely. Just cover them well in the fridge.
Is There a Dairy-Free Version of This Dessert?
Yes! Use dairy-free cream cheese and coconut cream to replace cream cheese and heavy cream, and opt for dairy-free chocolate chips. The texture may vary slightly but it will still be delicious.