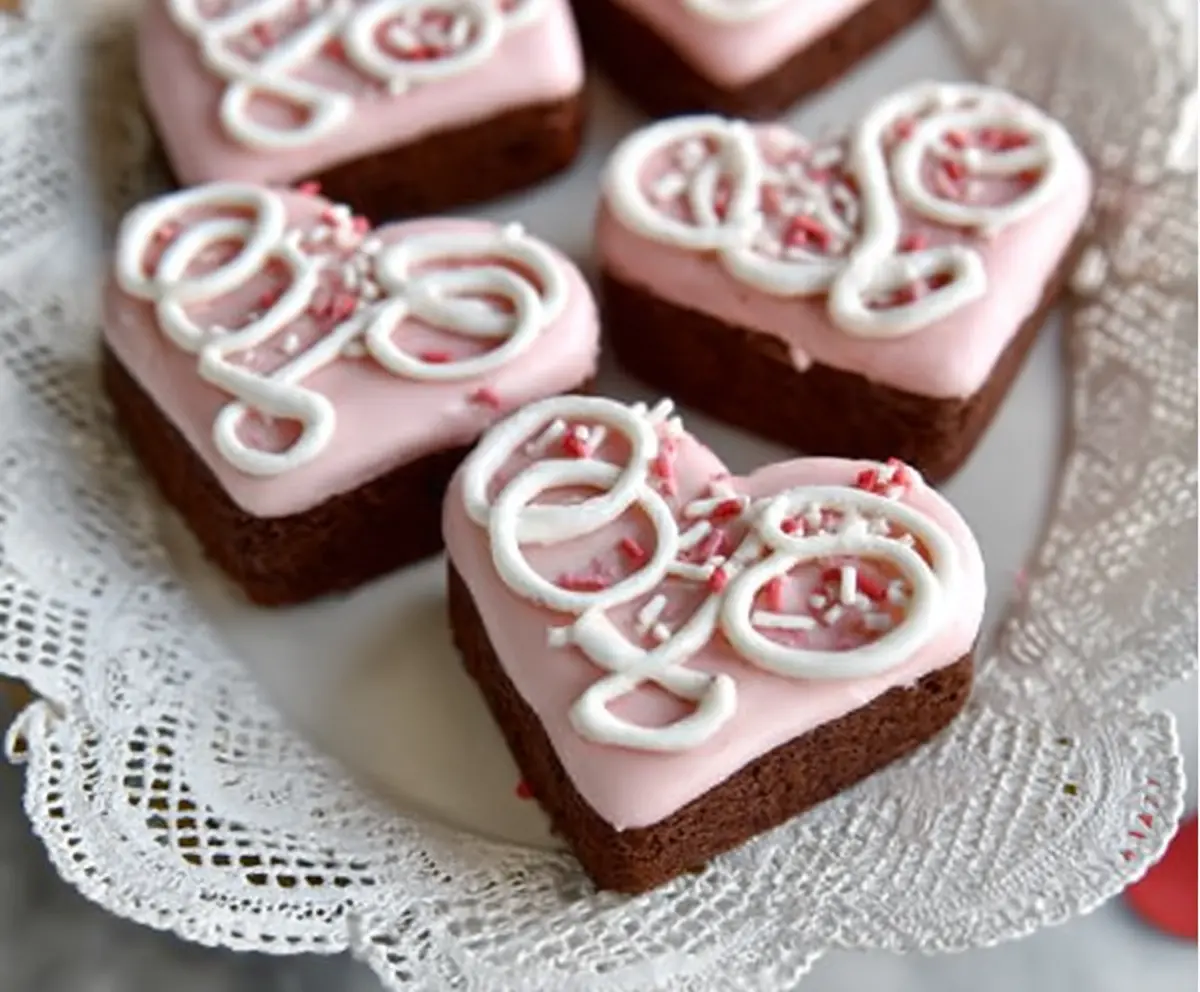
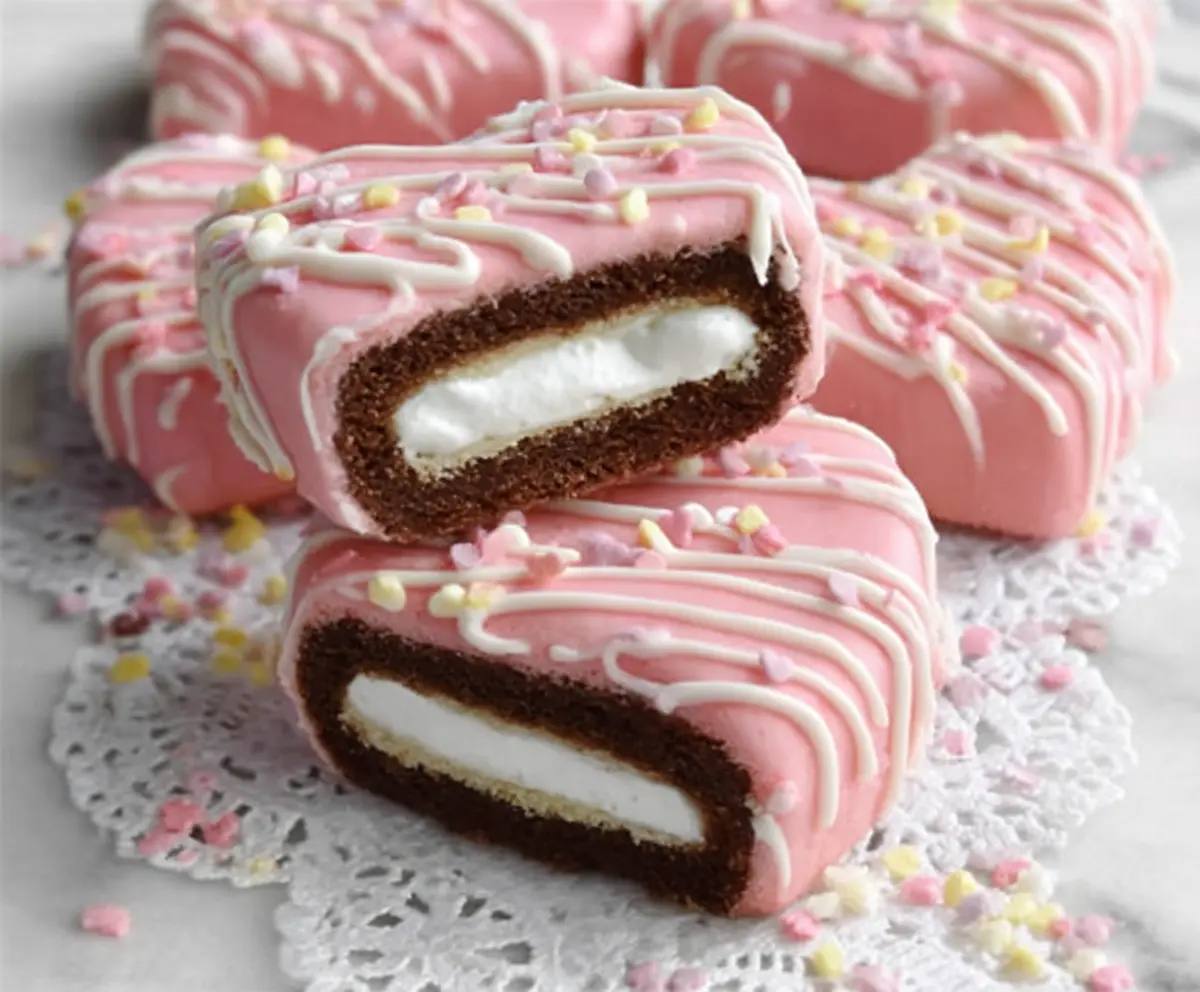
Copycat Little Debbie Valentines Cakes are the perfect treat for anyone who loves that classic, soft, and fluffy cake with a smooth, creamy filling and a sweet chocolate coating. These little cakes are super cute, decorated with festive red and pink sprinkles, making them perfect for Valentine’s Day or any time you want a sweet little pick-me-up. The combination of the pillowy cake and the rich frosting inside is just so comforting and fun to eat.
I love making these at home because it feels like a fun project that’s not too complicated, and you get to decorate them however you like. Plus, I find that homemade versions let you control the sweetness and really enjoy every bite. I usually make a batch and save some for friends and family—it’s such an easy way to share a little love and show you care with something homemade. My tip? Chill the cakes well before dipping them in chocolate, so they hold together nicely and get that smooth coating.
They’re great for gifting, party snacks, or even just a special treat during the week. I remember sharing them with my kids on a chilly afternoon, and the smiles made it all the more special. Making these Copycat Little Debbie Valentines Cakes is like bringing a little piece of the bakery right into your kitchen, and it’s hard not to smile while eating one (or two!).
Key Ingredients & Substitutions
Chocolate Cake: This cake is soft and chocolatey thanks to cocoa powder and buttermilk. If you don’t have buttermilk, use regular milk with a teaspoon of vinegar or lemon juice added.
Filling: Butter and powdered sugar make the creamy center. For a lighter option, try cream cheese instead of butter. Adjust milk to get the perfect spreadable texture.
Pink Icing: Powdered sugar and a bit of milk create the smooth pink topping. Use any food coloring you prefer, or try natural options like beet juice for color.
Decorations: White frosting or royal icing is great for piping. If you don’t want royal icing, a simple thick vanilla icing with powdered sugar and milk works well too.
How Do I Get Perfect Cake Shapes and Smooth Icing?
First, bake the cake in a shallow pan for an even, thin layer. When fully cool, use a sharp cookie cutter or knife to cut neat shapes—hearts or rectangles. Chill these pieces briefly so they’re firm and easier to work with.
When spreading the pink icing, keep it thick but scoopable. Spread evenly and quickly so it starts to set without melting into the cake. Pipe your “XOXO” designs with frosting while the icing is still soft, then add sprinkles to stick nicely.
Chilling the cakes after assembling helps everything set, giving you clean edges and a smooth, pretty finish—just like store-bought but freshly homemade!
Equipment You’ll Need
- 9×13-inch baking pan – I like using this size for an even, flat cake layer that’s easy to cut into shapes.
- Mixing bowls – for combining the cake batter and filling ingredients, making everything organized.
- Whisk or electric mixer – helps get the batter and filling smooth and fluffy.
- Cookie cutters or a sharp knife – to shape the cooled cake into hearts or rectangles.
- Spatula and piping bag – for spreading the icing and piping “XOXO” details.
- Cooling rack – to cool the cake completely without sogginess.
- Small bowls and spoons – to prepare and mix the pink icing and sprinkles.
Flavor Variations & Add-Ins
- Use white or vanilla cake instead of chocolate for a lighter flavor, and switch the filling to vanilla buttercream.
- Add a splash of peppermint or almond extract to the filling for a fun twist.
- Decorate with different sprinkles, like hearts or glitter, to match other themes or holidays.
- Swap the pink icing for red, purple, or pastel shades to suit your style or occasion.
Copycat Little Debbie Valentines Cakes
Ingredients You’ll Need:
For the Chocolate Cake:
- 1 cup all-purpose flour
- 1/2 cup granulated sugar
- 1/4 cup unsweetened cocoa powder
- 1 teaspoon baking powder
- 1/4 teaspoon baking soda
- 1/4 teaspoon salt
- 1/2 cup buttermilk
- 1/4 cup vegetable oil
- 1 large egg
- 1 teaspoon vanilla extract
For the Filling:
- 1/2 cup unsalted butter, softened
- 1 1/2 cups powdered sugar
- 1 teaspoon vanilla extract
- 1-2 tablespoons milk or cream
For the Pink Icing:
- 1 cup powdered sugar
- 2-3 teaspoons milk or cream
- A few drops of red or pink food coloring
For Decoration:
- White frosting or royal icing for piping “XOXO”
- Pink, red, and white sprinkles
How Much Time Will You Need?
This recipe takes about 15 minutes to prepare, plus 18–22 minutes to bake. You’ll also want to allow around 30 minutes for cooling and decorating, plus extra chilling time if you want firmer cakes before serving. In total, plan about an hour to have these sweet treats ready to enjoy.
Step-by-Step Instructions:
1. Bake the Chocolate Cake:
Preheat your oven to 350°F (175°C). Grease and flour a small rectangular or heart-shaped baking pan. In a large bowl, whisk together the flour, sugar, cocoa powder, baking powder, baking soda, and salt. In another bowl, whisk the buttermilk, vegetable oil, egg, and vanilla extract until well combined. Pour the wet ingredients into the dry ingredients and mix just until combined.
Pour the batter into the prepared pan and smooth the top. Bake for 18-22 minutes, or until a toothpick inserted in the center comes out clean. Remove from the oven and let the cake cool completely on a wire rack.
2. Make the Filling:
While the cake cools, beat the softened butter in a bowl until creamy. Gradually add powdered sugar and vanilla extract, beating well after each addition. Add milk or cream one tablespoon at a time until you reach a thick but spreadable frosting consistency.
3. Assemble the Cakes:
Once the cake is completely cool, turn it out onto a cutting board. Use a knife or cookie cutter to cut cake pieces into small rectangles or hearts, about 2 inches across. Spread a generous layer of the filling on one cake piece, then top it with another cake piece to form a sandwich. Repeat with remaining pieces.
4. Prepare and Add the Pink Icing:
Mix powdered sugar with milk or cream and food coloring until smooth, spreadable, and thick enough to hold its shape when spread. Spread the pink icing evenly over the top of each cake sandwich.
5. Decorate and Set:
Pipe “XOXO” on each cake with white frosting or royal icing. While the icing is still wet, sprinkle pink, red, and white sprinkles over the top for a festive look. Let the cakes set at room temperature or in the fridge for the icing to firm up before serving.
Enjoy your adorable homemade Copycat Little Debbie Valentines Cakes—soft chocolate cake sandwiches topped with sweet pink icing and cute decorations, perfect for sharing love and sweetness!
Can I Use Regular Milk Instead of Buttermilk?
Yes! If you don’t have buttermilk, simply add 1 tablespoon of vinegar or lemon juice to 1/2 cup of regular milk. Let it sit for 5 minutes before using to mimic buttermilk’s tang and texture.
How Should I Store Leftover Valentines Cakes?
Store them in an airtight container in the refrigerator for up to 3 days. Bring to room temperature before serving for the best flavor and texture.
Can I Make These Cakes Ahead of Time?
Absolutely! You can bake the cake and prepare the filling a day ahead. Assemble and decorate the cakes the day you plan to serve to keep them fresh and looking their best.
What Can I Use Instead of Royal Icing for Piping?
White buttercream frosting or store-bought decorating frosting works well for piping “XOXO.” Just be sure it’s thick enough to hold its shape when piped.