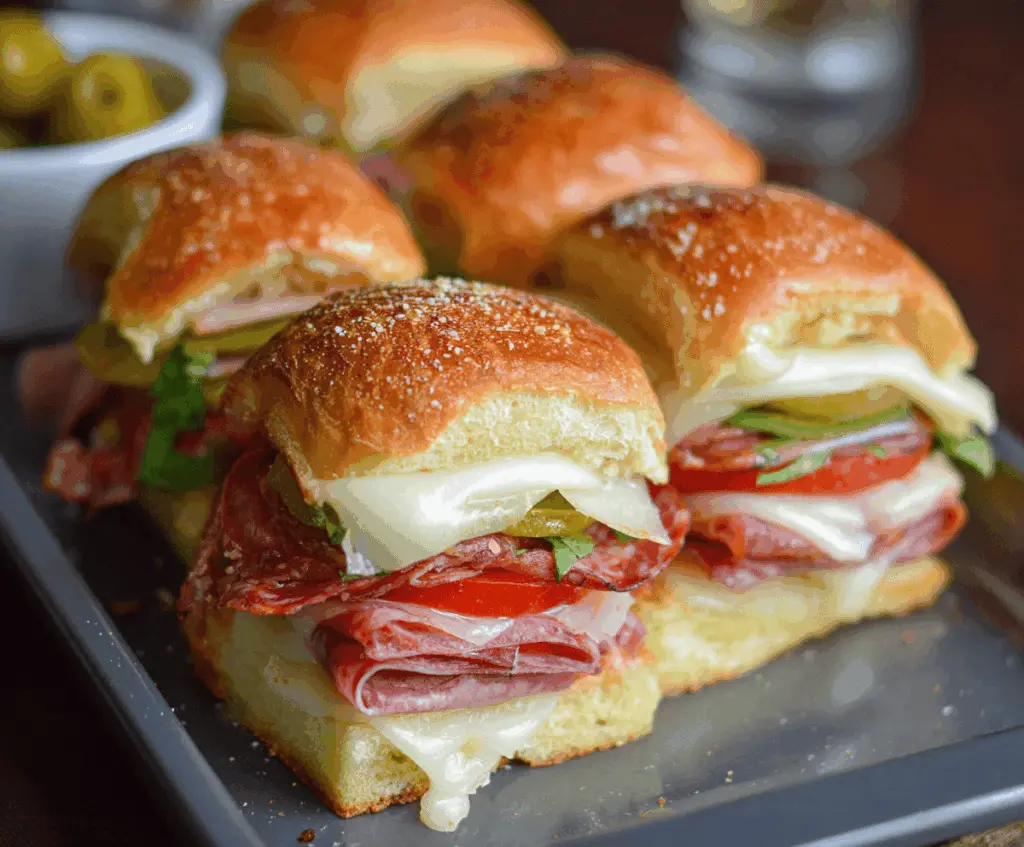
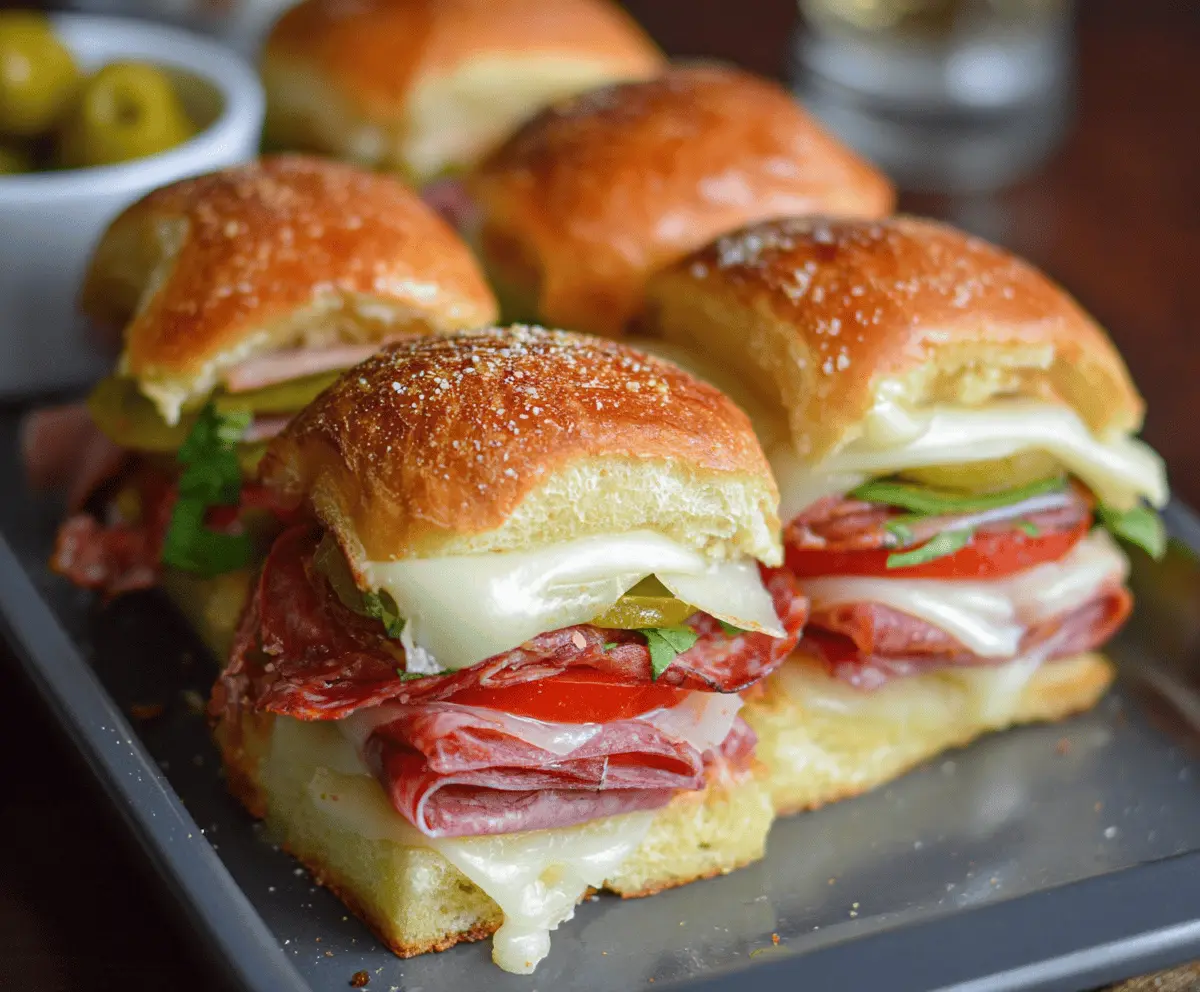
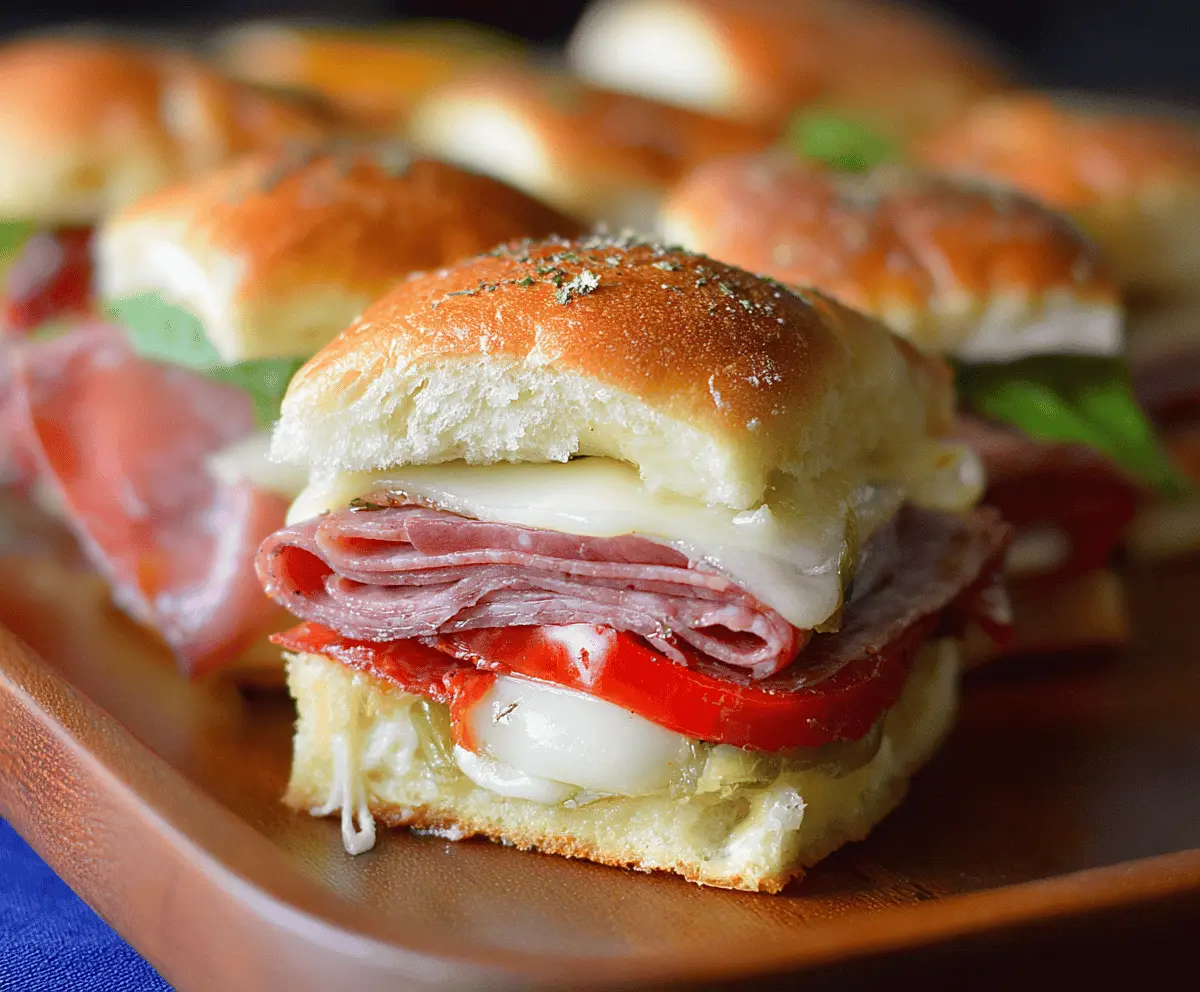
Hot Italian Sub Sliders are little bundles of bold flavors and fun. Think of all your favorite Italian sandwich ingredients—spicy salami, layers of provolone, crisp lettuce, juicy tomatoes, and tangy pickles—all packed into small, soft slider buns. They have just the right kick from some peppery seasonings, making each bite a perfect mini flavor explosion.
I love making these sliders when I want something easy to share at a party or a casual get-together. They’re quick to put together and everyone always reaches for seconds. One little tip I’ve found helpful is to toast the buns lightly before assembling; it adds a nice crunch and keeps the sandwich from getting soggy too fast. Plus, who doesn’t love a warm, toasty bun?
For serving, I usually put out a big platter with a few different dips and some pickles on the side. They pair wonderfully with a cold drink and some good company. Hot Italian Sub Sliders have this way of bringing people together, and I think it’s because they’re packed with familiar flavors but served in a fun, easy-to-eat way that just makes everyone smile.
Key Ingredients & Substitutions
Slider Buns: Soft dinner rolls work best here for a fluffy, slightly sweet bite. If you want a whole grain option, try small whole wheat buns or brioche for richer flavor. Avoid crusty bread as it’s harder to eat as a slider.
Meats: The mix of ham, salami, and pepperoni gives a nice balance of flavors—smoky, spicy, and savory. If you prefer less spice, swap pepperoni for turkey or mild soppressata.
Cheese: Provolone and mozzarella melt beautifully together, adding both creaminess and mildness. You could try swapping mozzarella for fontina or gouda for a different twist.
Veggies & Peppers: Tomato and lettuce add freshness, while pepperoncini add a tangy, mild heat. If you can’t find pepperoncini, banana peppers or mild pickled jalapeños work well too.
Seasoned Butter: The blend of melted butter with garlic powder and Italian seasoning on top gives the sliders a golden, flavorful crust. You can add a pinch of red pepper flakes for an extra kick.
How to Get the Perfect Melt and Golden Buns Without Sogginess?
Melting the cheese evenly while keeping buns soft but not soggy is key. Here’s how I do it:
- Keep buns attached when slicing to make a slider “sheet.” This helps them bake evenly and stay together.
- Spread a thin layer of mayo on the buns to add flavor and create a moisture barrier.
- Brush the tops with seasoned melted butter before baking—this helps them brown nicely.
- Bake covered for about 15 minutes at 350°F so cheese melts without drying out buns.
- Let sliders cool a few minutes before cutting to help fillings settle and avoid spilling.
This method keeps the sliders juicy inside with just the right golden crust outside, making every bite a delight!
Equipment You’ll Need
- Baking dish or pan – I use a rectangular dish big enough to hold all the sliders in a single layer, making baking and serving easier.
- Sharp knife – to carefully slice the slider buns without tearing them apart.
- Brush or spoon – for spreading melted butter mixture on top of the buns to get that golden, flavorful crust.
- Measuring spoons and cups – for seasonings and toppings, ensuring everything is balanced.
- Oven – a standard 350°F (175°C) oven does the job, so just make sure it’s preheated.
Flavor Variations & Add-Ins
- Spicy kick: Add sliced jalapeños or hot cherry peppers for more heat, perfect if you love spice.
- Cheese swap: Use pepper jack or smoked Gouda instead of provolone and mozzarella for extra flavor.
- Veggie boost: Layer in roasted peppers, sautéed mushrooms, or thinly sliced onions for added texture and taste.
- Herbal touch: Sprinkle chopped basil or oregano over the fillings before baking for fresh, fragrant notes.
Hot Italian Sub Sliders
Ingredients You’ll Need:
- 12 slider buns or soft dinner rolls
- 6 slices provolone cheese, halved
- 6 slices mozzarella cheese, halved
- 6 slices pepperoni
- 6 slices salami
- 6 slices ham
- 1 large tomato, thinly sliced
- 1/4 cup sliced pepperoncini or banana peppers
- Fresh lettuce leaves, for layering
- 1/4 cup mayonnaise
- 1 teaspoon Italian seasoning
- 1 tablespoon melted butter
- 1/2 teaspoon garlic powder
- 1 tablespoon grated Parmesan cheese
How Much Time Will You Need?
This recipe takes about 15 minutes to prepare and another 15 minutes to bake. In just 30 minutes, you’ll have warm, cheesy, and flavorful sliders ready to serve, perfect for sharing with family and friends.
Step-by-Step Instructions:
1. Preparing the Sliders:
Preheat your oven to 350°F (175°C). Carefully slice the slider buns horizontally, keeping them attached if you can to create a pull-apart slider sheet. Spread mayonnaise evenly on the inside bottom halves of the buns.
2. Adding the Fillings:
Layer the meats over the mayo starting with ham, then salami, followed by pepperoni. Next, place half slices of provolone and mozzarella cheese over the meats. Top each slider with a slice of tomato, a few pepperoncini slices, and fresh lettuce leaves.
3. Finishing and Baking:
Place the top halves of the buns over the fillings. Mix melted butter with garlic powder and Italian seasoning, then brush this mixture generously over the tops of the buns. Sprinkle grated Parmesan cheese over the buttered tops. Place the entire slider tray into a baking dish or pan.
4. Baking and Serving:
Bake in the preheated oven for about 15 minutes, or until the cheese is melted and the tops of the buns turn golden brown. Remove from oven and let the sliders cool for a few minutes before cutting them apart. Serve warm and enjoy!
Can I Use Different Meats in These Sliders?
Absolutely! Feel free to swap out the ham, salami, or pepperoni for turkey, roast beef, or even a vegetarian deli substitute to suit your taste or dietary needs.
How Should I Store Leftover Sliders?
Store leftover sliders in an airtight container in the refrigerator for up to 3 days. Reheat them in the oven at 350°F for about 10 minutes to regain that delicious melted cheese and warm bread texture.
Can I Make These Sliders Ahead of Time?
Yes! Assemble the sliders fully (except for the butter topping), cover tightly, and refrigerate for up to a day. When ready, brush with the butter mixture and bake just before serving to keep them fresh and tasty.
What’s the Best Way to Prevent the Buns from Getting Soggy?
Spreading a thin layer of mayonnaise on the bottom bun creates a moisture barrier. Also, toasting the buns lightly before assembling can help keep them from getting soggy during baking.